
Autofill Using Fillers
LogicalDOC allows you to automatically populate document metadata using Fillers.
Fillers analyze the content of a document and assign values such as tags, language, or template without manual input.
Autofill can be performed in different ways depending on your workflow:
- Manually, by executing a specific filler
- Using predefined autofill actions (e.g. tags, language)
- Automatically through folder policies
Apply a Filler from the Capture Tab
You can manually apply fillers to a document that is already stored in the system.
With a selected document, go to the Capture tab, select a filler from the Filler drop-down list, and save. After that, you can click Process.
The selected filler will analyze the document and update its properties accordingly.
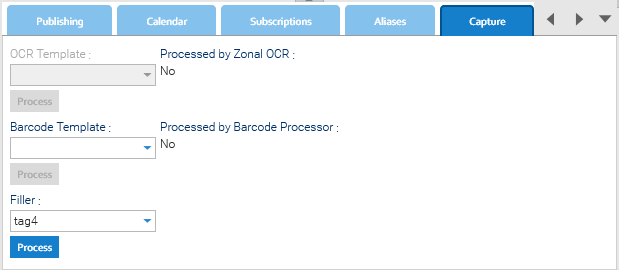
In the example, a Tag filler is selected, but any available filler can be used depending on the desired result.
After processing, open the Properties tab to view the updated values.
Autofill from the Properties Tab
You can also trigger autofill for specific fields (tags and language) directly from the Properties tab.
Autofill Tags
With the document selected, open the Properties tab and click on the Edit tags icon next to the Tags label.
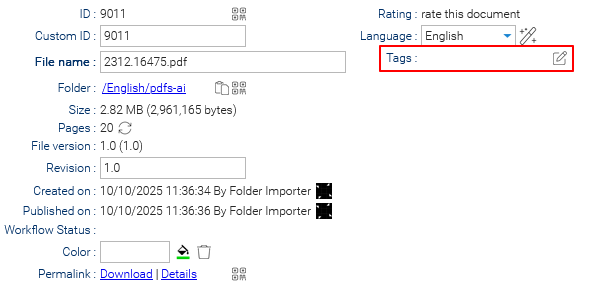
Once the Edit tags icon is clicked, a new set of tag-editing settings appears.
With these new settings, it is possible to manually add tags or to click on the Autofill icon to automatically populate the Tags field.

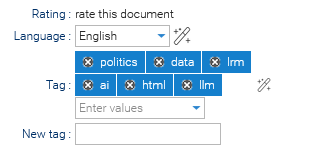
At this point, you can edit the selection or finalize it by clicking Save.
Info
When you click on the Autofill icon, the system will find the first configured filler of type Tag. If no Tag filler has been created in the system, this feature won't work.
Autofill Language
Autofilling the language, or autofilling it again if the presented language is incorrect, is simpler.
Go to the Properties tab and click the Autofill icon next to the Language field
The system will automatically detect and assign the document's language.
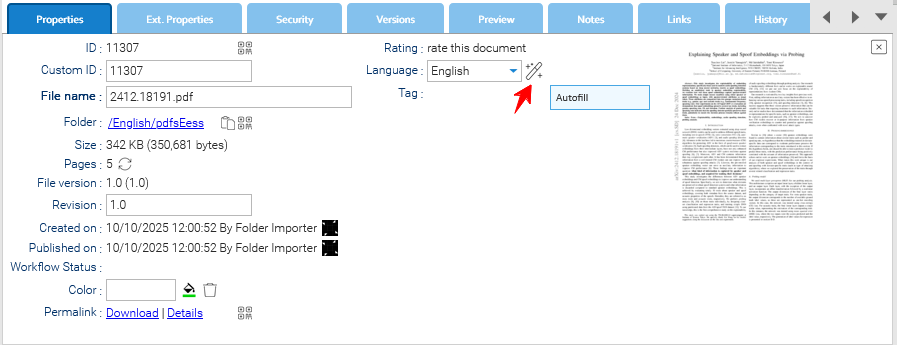
Autofill automatically through folder policies
Similarly to what happens with documents, by selecting a folder, it is possible to define a filler in the Capture tab of that folder.
This selection will automatically define the filler for every document placed in that folder.
Using the Explain Action
The Explain action executes the selected filler and generates an HTML report that illustrates each step of the extraction process.
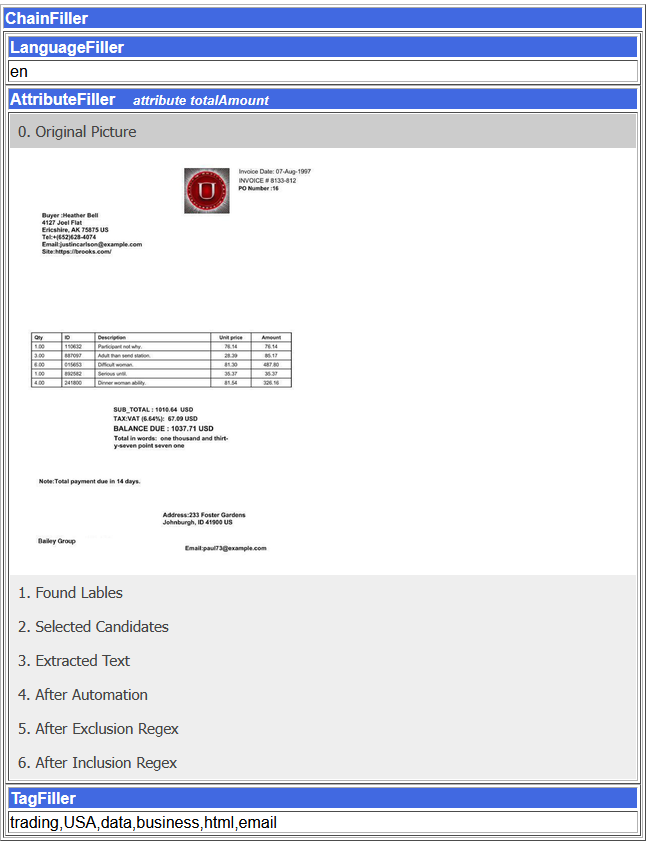
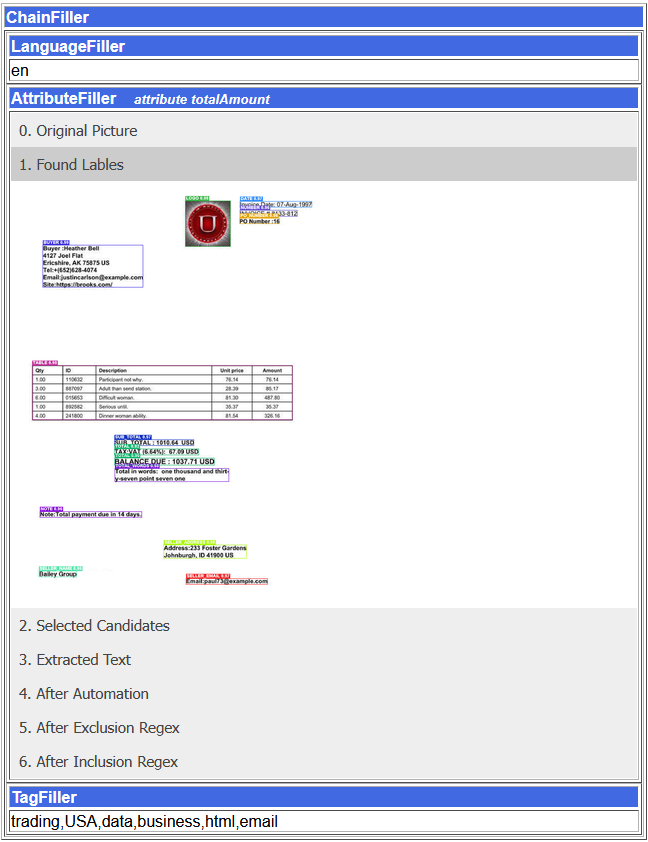
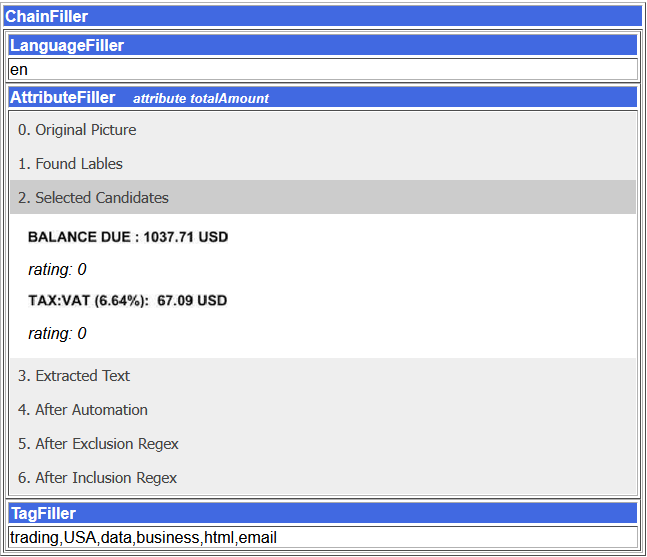
The report shows the original document page, the labels detected by the YOLO model, the candidate labels evaluated, the text extracted from the selected region using OCR, and any transformations applied through automation scripts or regular expressions before the final value is assigned to the document attribute.
This information is useful for validating the configuration of the filler and troubleshooting unexpected extraction results.
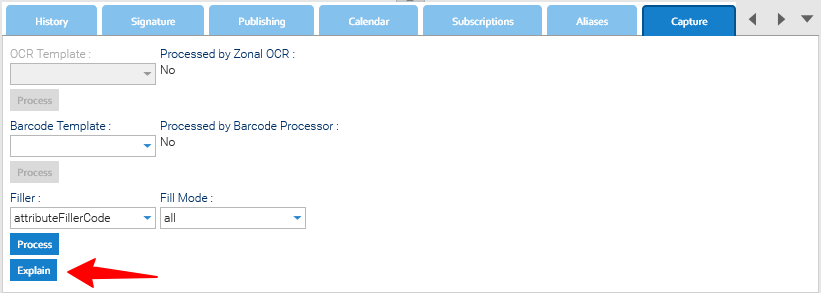
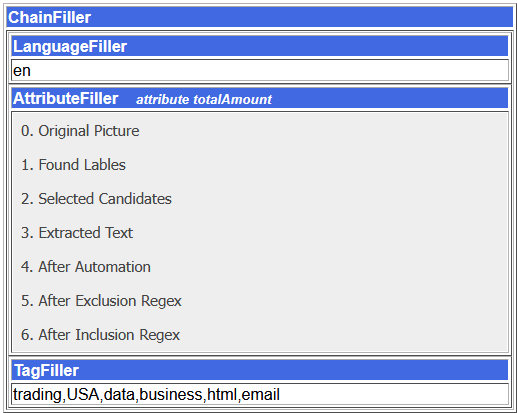
In the example below, the Explain action was executed on a document using a Chain Filler.
The configured chain consists of three fillers: a Language Filler, an Attribute Filler, and a Tag Filler
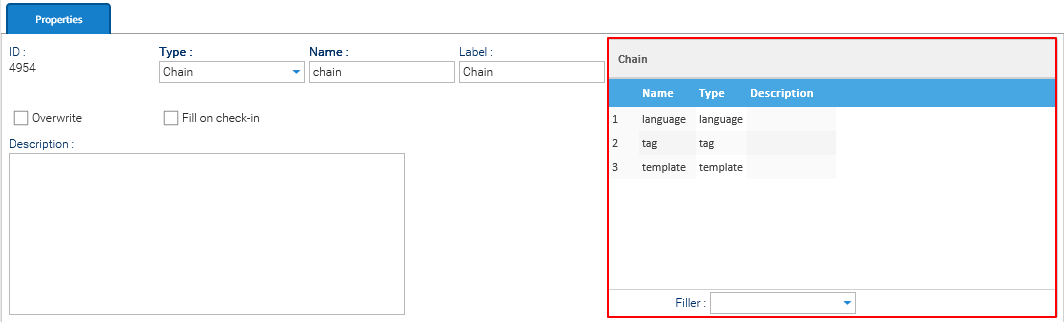
The generated explanation report contains a separate section for each filler in the chain, showing the result of its execution.
For fillers that perform multiple processing steps, such as the Attribute Filler, the report provides a detailed breakdown of each stage, including the detected labels, candidate selection, OCR output, and any transformations applied before the final value is assigned to the document.