
Workflow

All the documents evolve according to a defined life cycle. There are different ways that this can be done. One option is to use a workflow.

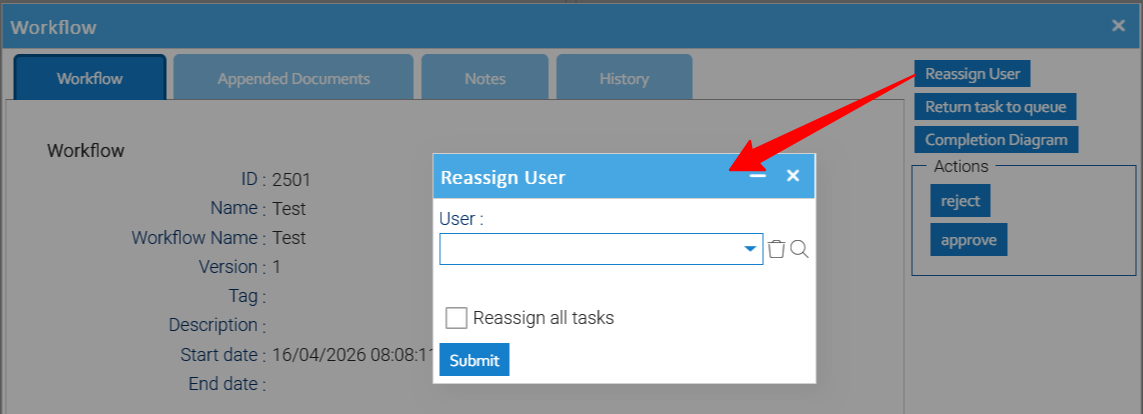
A workflow is a process in which a chain of users is defined to review, approve or reject a document. Workflows are traditionally used to validate documents (make them go to an "Approved" state), but they can also be used to have the document reviewed without a life cycle state change.

Your workflows can be created in the Workflow designer integrated in the LogicalDOC application. Users who are involved in workflows are alerted by email. They can have a synthetic view of all the tasks that they have to do on documents in their dashboard. The documents for review are listed there.

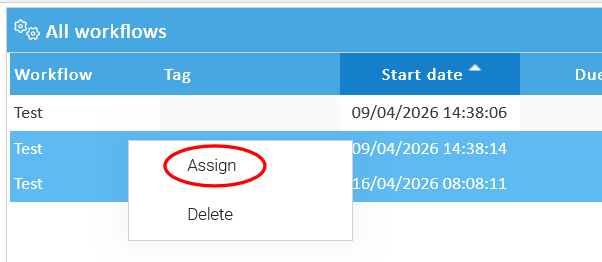
The administrator creates workflow templates based on his organizational business process. Any system user may be involved in a workflow on one or more documents. 

The workflow consists of Tasks and Transitions that a collection of documents must pass through before the workflow can be considered complete.

  • Task: can be defined as a stage in a document’s life-cycle, such as 'billed', or 'draft'. Each workflow has a single start task, which is the initial task (displayed in green).
  • Transition: defines how documents move between tasks in the workflow. Transitions are actions that move a document to the next task.

Properly configure the SMTP connection

The workflow engine notifies the required persons when tasks must be worked on, so it is important to correctly configure the connection to your SMTP server.

Workflow Elements

Each workflow is composed by several tasks connected by transitions. In the designer, each task is drawn as a box with specific icon and color, and you can move them simply by dragging the object where you want in the drawing panel. To edit the properties of a specific element, just double-click on it to open the context menu.

Here below, you can see all the different types of tasks you can use.

TASK

A task represents a specific activity that can be accomplished by a number of participants.

Each template must have an initial task that is the first status where it is positioned in the workflow when started. To mark a task as initial, double-click on it and select the Start Status item.

FORK

Sometimes it is necessary to launch two or more tasks at the same time, that's why the Fork primitive is available in the workflow designer. You can insert a Fork by clicking on Add Fork button. Basically, a fork is a special task that automatically starts two or more tasks when the workflow goes into the fork status.

JOIN

When you need to wait for various parallel activities to complete before moving on, it is necessary to insert a Join element.

Click on Add Join, and it appears the join object into the workflow schema design page. You can connect all the parallel activities to this node by using standard transitions, and the system will guarantee the completion of all these before passing control to the next task.

Of course with a Join you can have more ingoing transitions but only one outgoing, that is automatically triggered when all the parallel activities are completed.

END STATUS

The End Status is the primitive you have to use to model the end of the business process. When the workflow reaches this status, the execution ends. An End Status can accept ingoing transactions only.

Workflow History

In the Workflow section of the dashboard, click on History to access the complete history of all the workflow instances.

In the Workflow selector, choose one of the entries to which you have access and optionally put a tag you are looking for and press the Search button.

Then double-click on one of the workflow instances to see the detailed list of all the events.

Administrators can inspect all the instances, while other users can see only those instances they initiated or supervised.

Reassigning Tasks

If for some reason a task cannot be completed by the current assignee, it is possible to reassign it to another user.

Reassign from the task's detail

Inside the Workflow's dashboard double-click on the task and click on Reassign User.

Here just select the new user to assign the current task to, if you also check the Reassign all tasks option, all the other tasks currently operated by the same actual assignee will be reassigned too.

Reassign from the dashboard

In the list of tasks, select those you want to assign a different user, right-click to open the contextual menu and choose Assign.

Here just choose the new user to assign the current selection.


Completing a Task

Anytime a new task in which you are a participant has to be completed, you receive a notification by email. You can see all the details of the job in the Workflow section of the Dashboard.

Here you find three dashlets that show:

  • tasks assigned to you directly
  • tasks which you can take the ownership
  • tasks of workflows in which you are the supervisor

Workflow Dashboard
 

Take the ownership of a task

In the dashlet Tasks I can own double click on the task you want to start working on and then click on the Take OwnerShip button. Please note that this task is moved into the dashlet Tasks assigned to me. If you are the only possible participant of a task, the system will automatically assign it to you so you will be not required to manually take the ownership.

Complete a task

Double-click on a task you already own to open the details' dialog box.

Here you can see all the details of the task, and in the Appended Documents tab you will find the list of documents currently included in the workflow.

Now you have all the information to complete the work and when you have finished it, just click on the button that reports the right transition name. This will complete the current task and the workflow will move on through the selected transition.

Appending new documents

Sometimes your work produces new documents which must be appended to the workflow, in this case just click on Add Documents to browse the folders and choose the documents to add, you can also use the current content of the clipboard by clicking on Add documents from clipboard.

Leave notes

If you open the Notes tab, you will see notes left by other colleagues involved in the same workflow, and you also can leave your own notes.

Workflow Progress

If you want to see the workflow progress, just click on Completion Diagram