")
")
")
Connect Microsoft 365 mail server
When you connect to Microsoft 365 mail server (that is Exchange Online), it is mandatory to use the OAuth v2.0 authentication scheme via SMTP. LogicalDOC uses the client credential flow to obtain the OAuth Token.
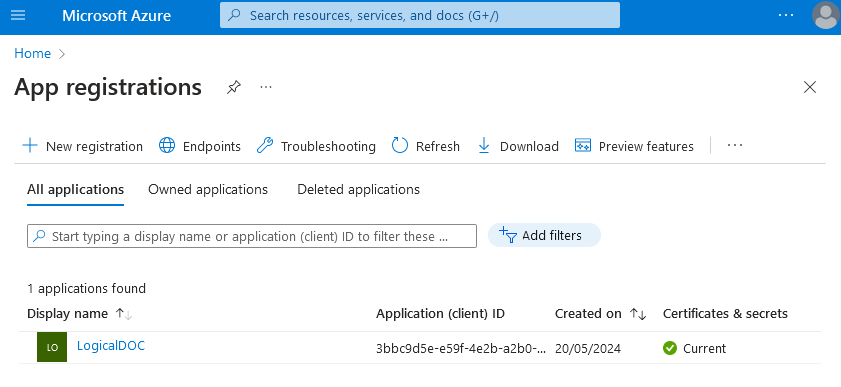
Register LogicalDOC as application in the Azure Portal
Open your Azure Portal, here in the Services section, open the App registrations. Click on New registration and enter LogicalDOC as the new application name.
Now that the application has been registered, please enter the API permissions to provide the following permissions:
Microsoft Graph
----------------------------------
Mail.Read
Mail.ReadBasic
Mail.ReadBasic.All
Mail.ReadWrite
Mail.Send
User.Read
Office 365 Exchange Online
----------------------------------
full_access_as_App
IMAP.AccessAsApp
Mail.Read
Mail.Send
Mail.Send.All
SMTP.SendAsApp
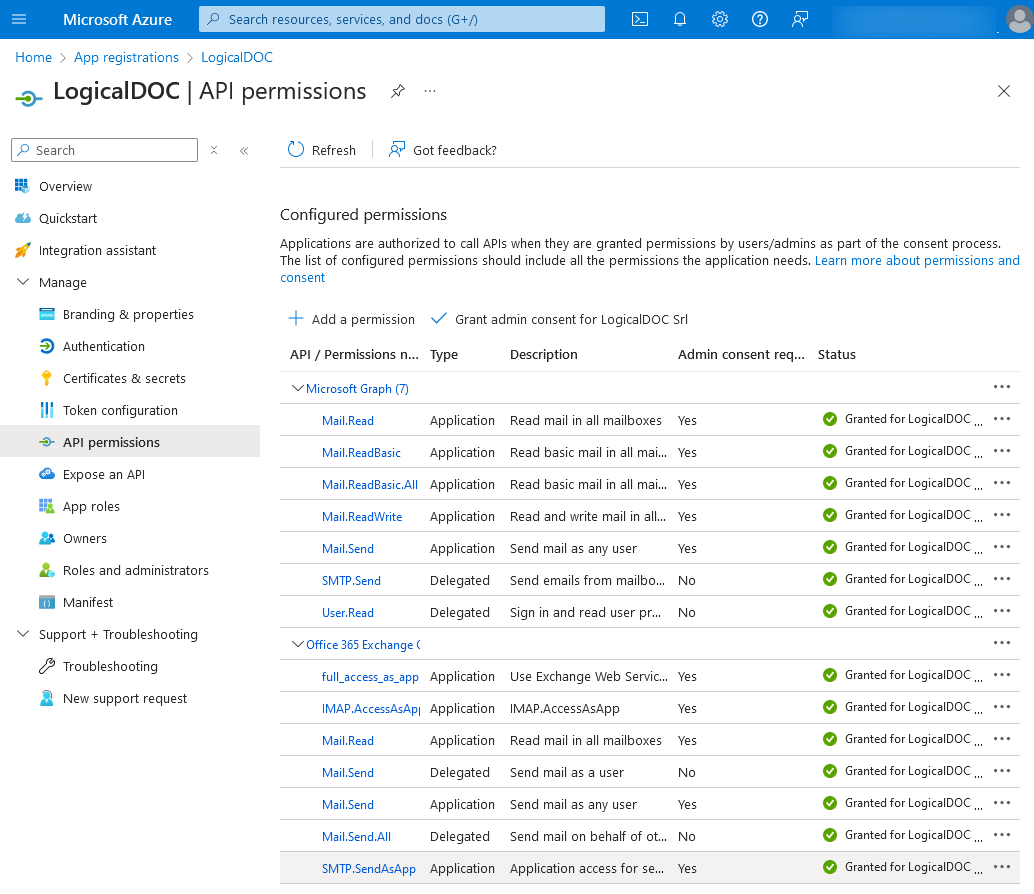
Grant admin consent
Make sure to grant admin consent for all the application permissions.
Create the service principal in Exchange Online
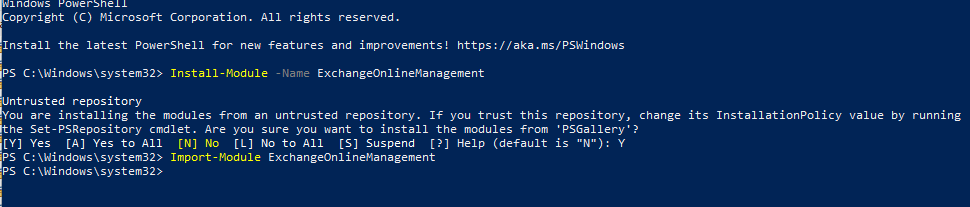
Once consent has been provided, the admin must register your application's service principal in Exchange using PowerShell.
Open the PowerShell and install the module ExchangeOnlineManagement with these commands:
Install-Module -Name Microsoft.Graph -RequiredVersion 2.25.0 -SkipPublisherCheck
Uninstall-Module ExchangeOnlineManagement -AllVersions -Force
Install-Module -Name ExchangeOnlineManagement -RequiredVersion 3.2.0 -SkipPublisherCheck
Import-Module ExchangeOnlineManagement
Now register the Service Principal in Exchange with these other commands:
Connect-MgGraph -Scopes "Application.Read.All"
Connect-ExchangeOnline
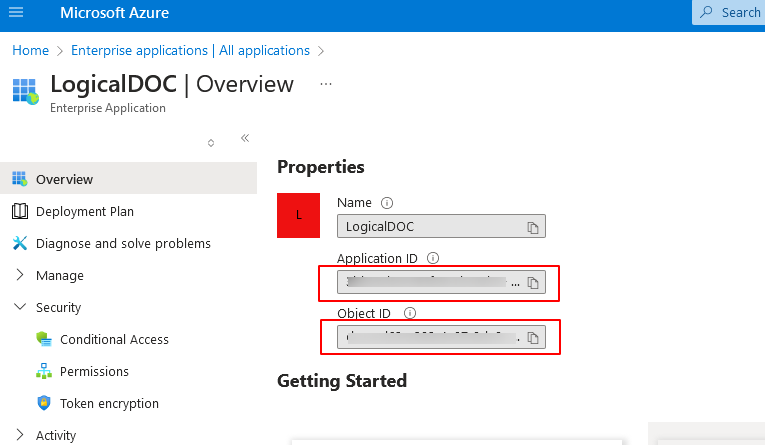
New-ServicePrincipal -AppId {Application ID} -ObjectId {Object ID}
Make sure to replace the {Application ID} and {Object ID} with those codes from Enterprise applications rather than object id of App registration.
For the same application you registered in App registration, a corresponding application has been created in Enterprise applications as well. You need to pass object id from there while registering service principal in Exchange:
Obtain the principal ID with this command:
Get-ServicePrincipal | fl
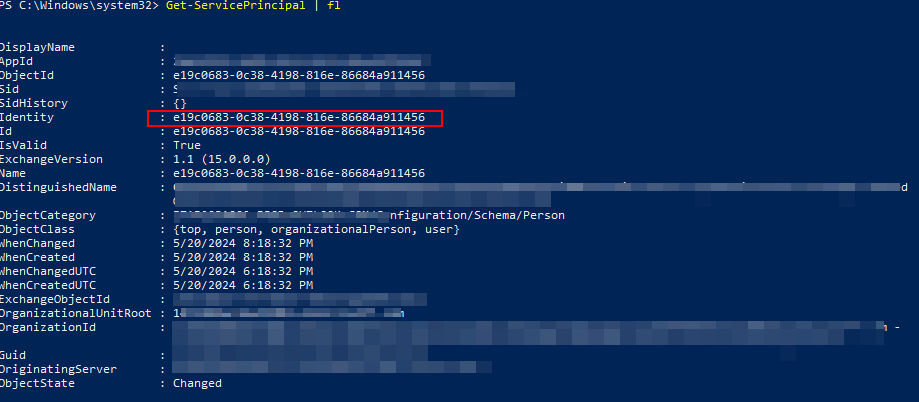
Add full permissions to the mailbox you use to connect with this command:
Add-MailboxPermission -Identity {your email} -User {principal id} -AccessRights FullAccess
Enable the SMTP with this command:
Set-CASMailbox -Identity {your email} -SmtpClientAuthenticationDisabled $false

Generate a client secret
In order to allow LogicalDOC to connect to your Microsoft 365 a secret must be generated, to do so open the details of your newly registered app.
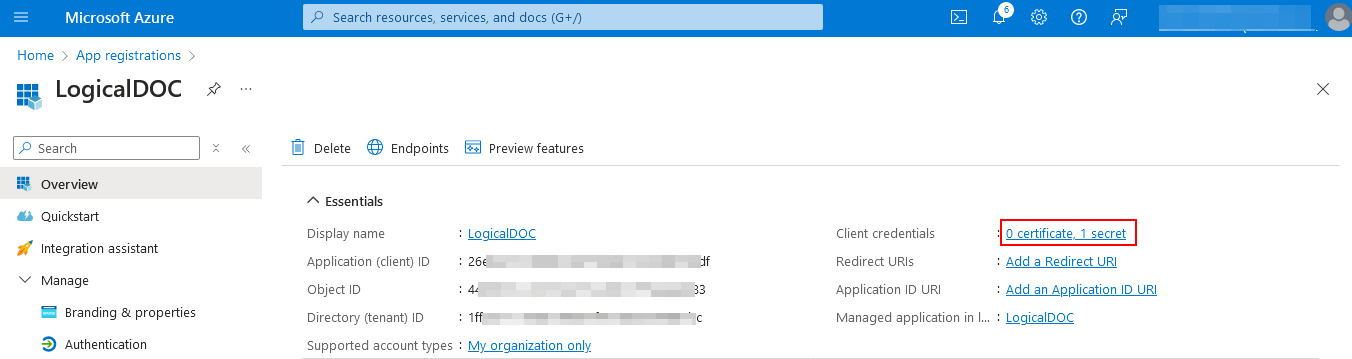
Here, click the Client credentials link and generate your secret.
Save the secret
Make sure to save the secret in a secure place because it is visible only now, and you will not be able to get it anymore in the future from the Azure portal.
Configure LogicalDOC
- Enter in Administration > Settings > Outgoing Email
- In the Protocol field put: SMTP Microsoft 365
- Enable the option Use secure authentication
- In the Server field, put: smtp.office365.com
- In the Port field put: 587
- In the Username and Sender Email put the same mailbox you use to connect
- Disable the option Use user's email as sender
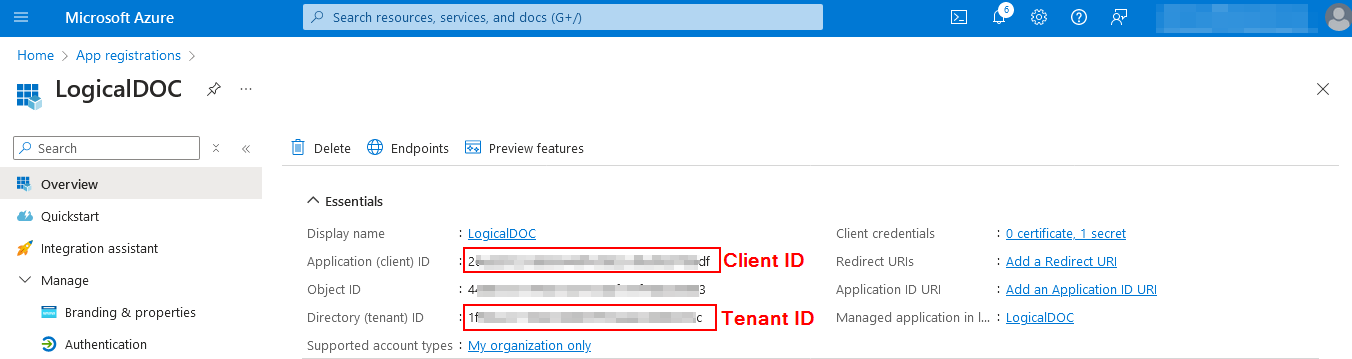
- In Client ID and Tenant ID put the values from the App details as you see in the Azure portal
-
In the Client Secret field, put the secret you previously saved
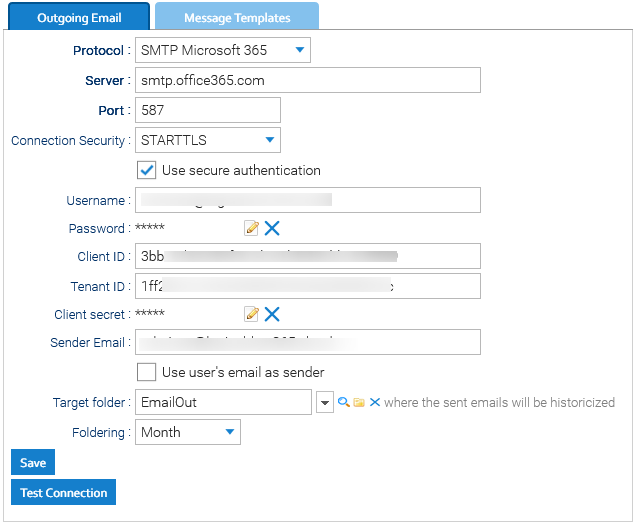
Save and test the connection.
Use user's email as sender
The settings described in this page make LogicalDOC to send all the emails as the same user that connects to your Exchange Online. If you want LogicalDOC to send the emails in the name of the other users(for instance, when a user sends a message from the interface), then enable the option Use user's email as sender. You also have to assign the Send As permission through the PowerShell as described in the Microsoft documentation.