")
")
")
Install on Synology
Synology is a global producer of advanced and intelligent Network-Attached Storages (NAS). Find more information about Synology here: https://www.synology.com.
Warning
Before installing LogicalDOC inside your device, you should be aware of hardware requirements and limitations. Click here to read more. Please be aware that we do not consider Synology ready for production and discourage you from implementing LogicalDOC over Synology.
Install the Docker package
In Synology, LogicalDOC will run as a Docker container. Docker is a virtualization environment available on all Synology devices, so open the package manager and install the Docker package.
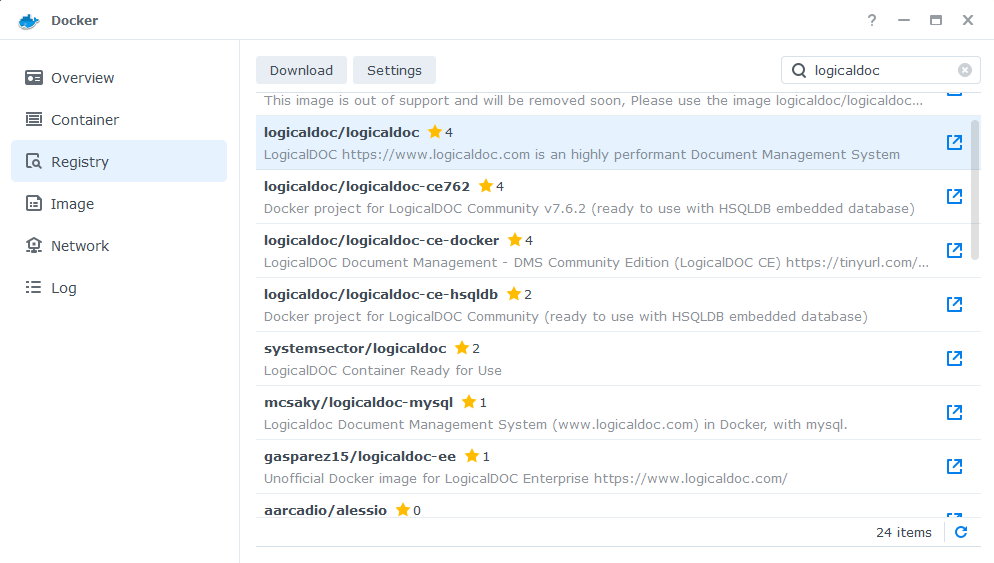
Set up the Database container
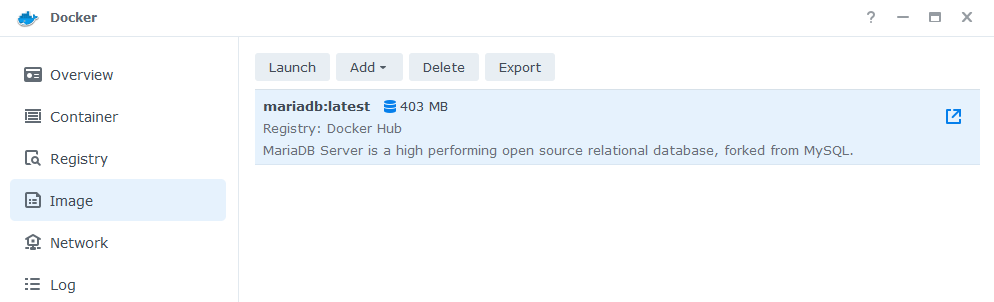
We will set up a MariaDB container that will be used by LogicalDOC, so enter the Registry tab of the Docker interface, find the latest mariadb image, and double-click on it to download.

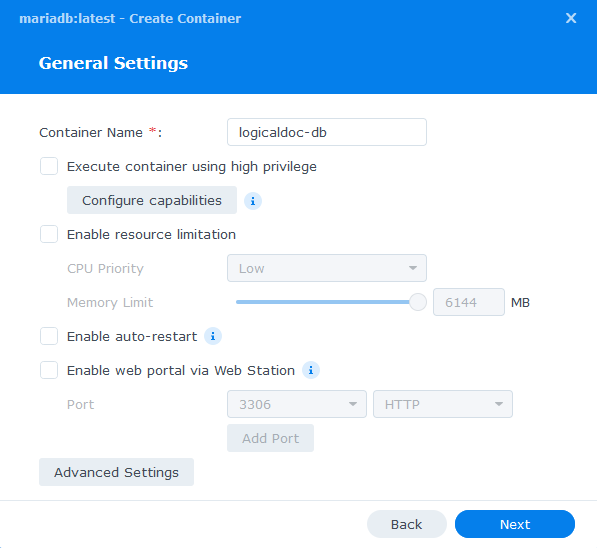
Once the image gets downloaded, double-click on it to create the container, the wizard will ask you the parameters, be sure to give the container name's logicaldoc-db:
Configure the working parameters
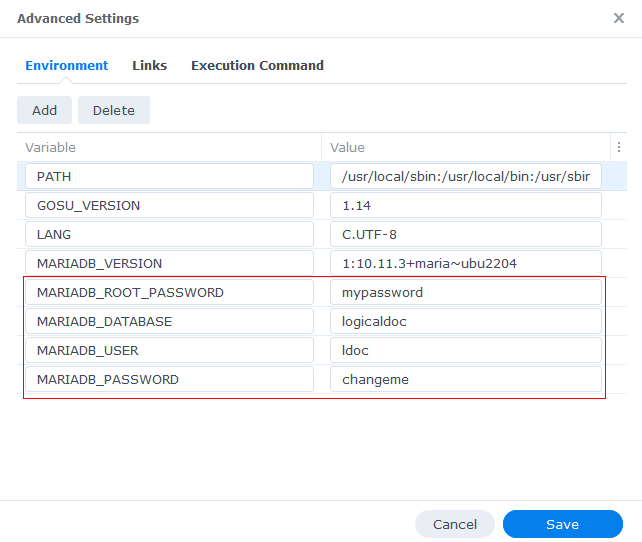
Open the Advanced Settings and with the Add button set the following parameters:
| Parameter | Suggested value | Description |
|---|---|---|
| MARIADB_ROOT_PASSWORD | mypassword | the password of the root user, LogicalDOC will not use it but you may use to manage your database |
| MARIADB_DATABASE | logicaldoc | name of the database where LogicalDOC will store the data |
| MARIADB_USER | ldoc | username used by LogicalDOC to connect to the database |
| MARIADB_PASSWORD | changeme | password used by LogicalDOC to connect to the database |
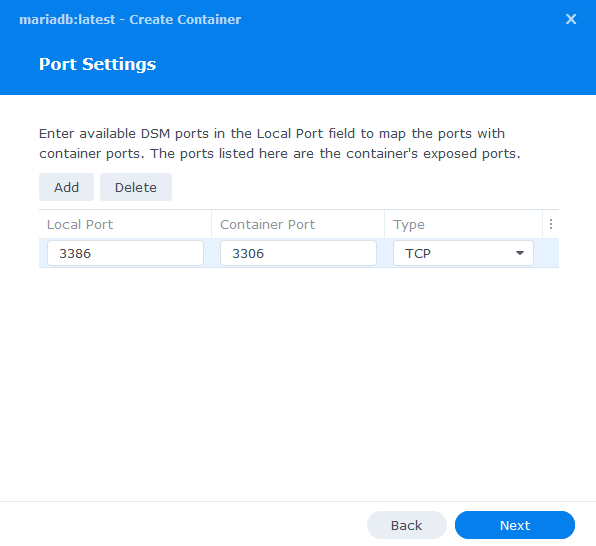
Map the ports
When asked to set up the ports, map the Container Port 3306 to the Local Port 3386.
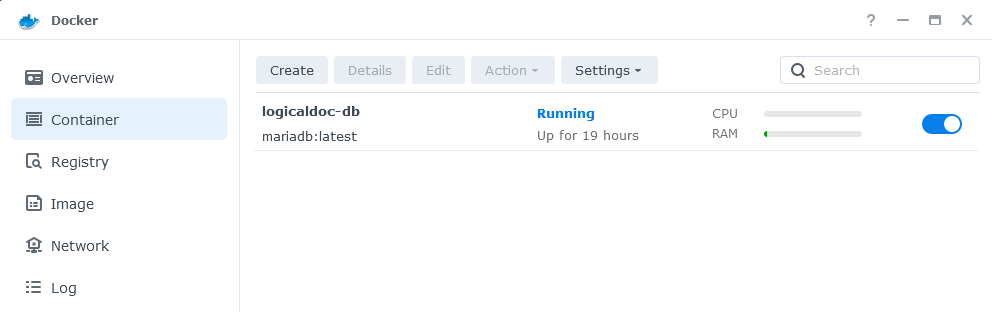
Check the running container
At the end, you should see the logicaldoc-db container up and running in the Docker environment:
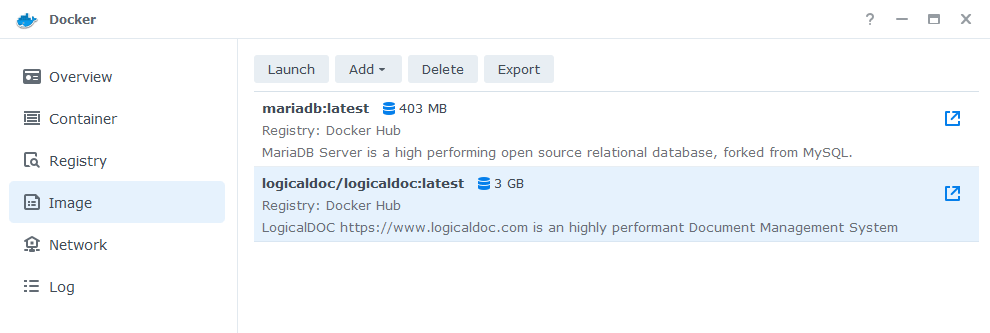
Set up the LogicalDOC container
After setting up the database, you proceed now to set up the container of the LogicalDOC application.
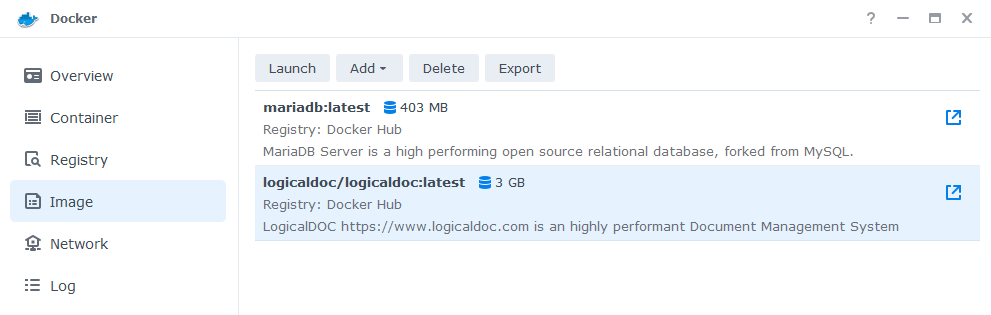
Enter the Registry tab of the Docker interface, find the latest logicaldoc image, and double-click on it to download.
Once the image gets downloaded, double-click on it to create the container, the wizard will ask you the parameters, be sure to give the container name's logicaldoc:
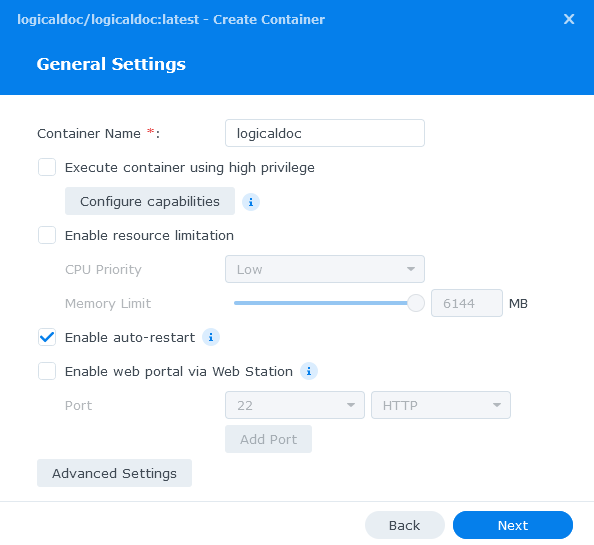
Configure the working parameters
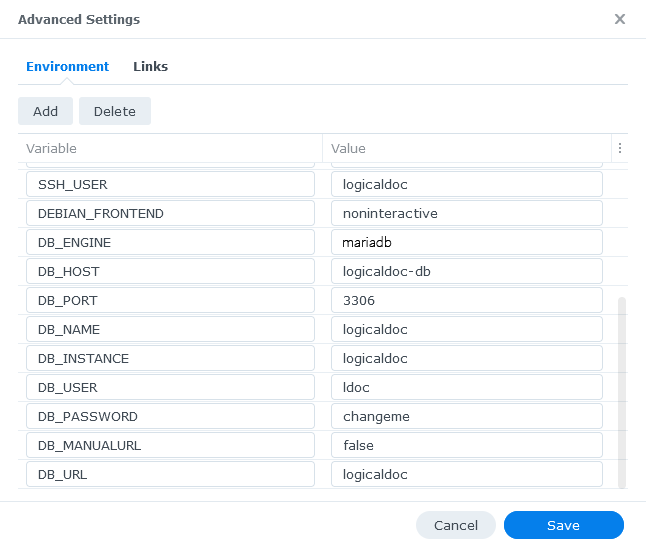
Open the Advanced Settings and set the following parameters:
| Parameter | Suggested value | Description |
|---|---|---|
| LDOC_USERNO | your own license code | you can get a trial license here: https://www.logicaldoc.com/try |
| LDOC_MEMORY | 3000 | memory allocated for LogicalDOC expressed in MB |
| DB_ENGINE | mariadb | the database type, possible values are: mariadb, mysql, mssql, oracle, postgres |
| DB_HOST | logicaldoc-db | the database server host |
| DB_PORT | 3306 | the database communication port, use the same port used for the logicaldoc-db contain |
| DB_NAME | logicaldoc | the database name, use the same db name used for the logicaldoc-db container |
| DB_INSTANCE | logicaldoc | some databases require the instance specification |
| DB_USER | ldoc | the database username, use the same username used for the logicaldoc-db container |
| DB_PASSWORD | changeme | the database password, use the same password used for the logicaldoc-db container |
| DB_MANUALURL | false | not used, leave it false |
| DB_URL | logicaldoc | not used, leave it logicaldoc |
| SSH_USER | logicaldoc | the username to connect via SSH |
| SSH_PASSWORD | changeme | the password to connect via SSH |
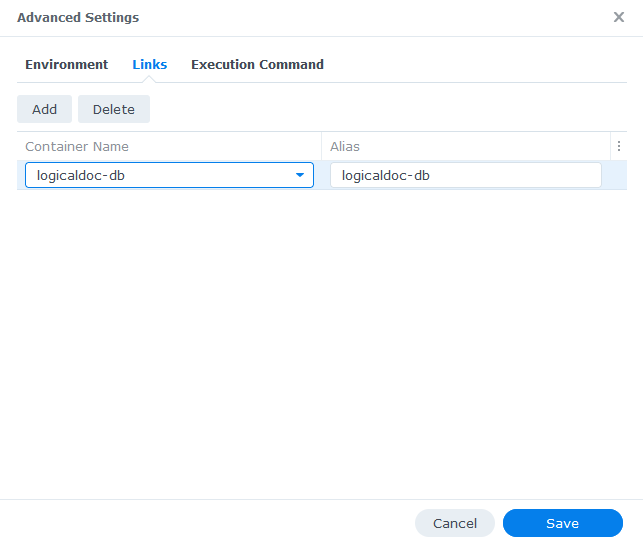
Link the database container
We also have to link the database container, so open the Links tab of the Advanced Settings and connect the logicaldoc-db container:
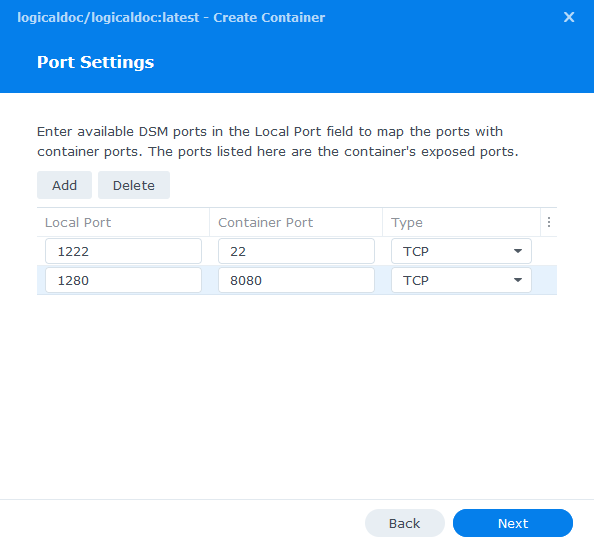
Map the ports
When asked to set up the ports, map the Container Port 8080 to the Local Port 1280 and the 22 to 1222:
Map the volumes
When asked to set up the volumes, we suggest creating a dedicated folder called logicaldoc somewhere in your NAS and then the subfolders logicaldoc/conf and logicaldoc/repository
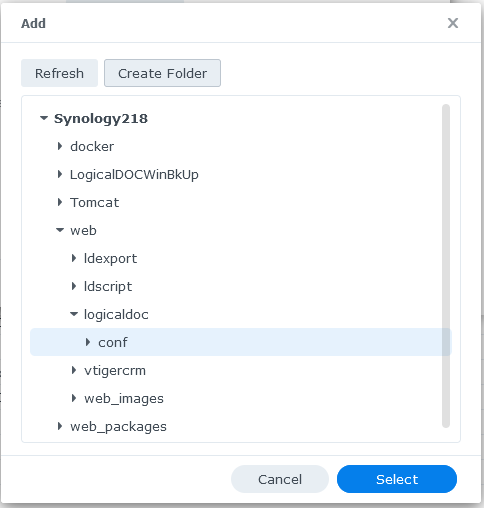

Then map those folders to the LogicalDOC's volumes /LogicalDOC/conf and /LogicalDOC/repository:
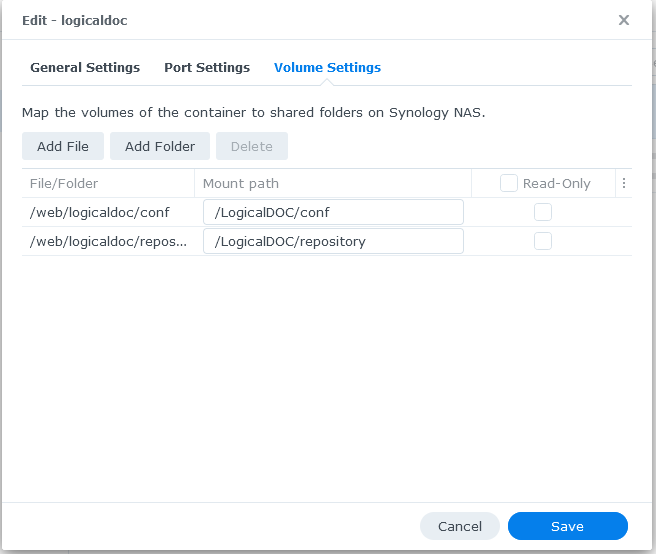
The volume /LogicalDOC/conf is where LogicalDOC saves the main configuration files, while the /LogicalDOC/repository is where your documents files are stored.
Check the running container
At the end, you should see the logicaldoc container up and running in the Docker environment:
At this point you should be able to enter LogicalDOC at http://IP_OF_YOUR_SYNOLOGY:1280 with admin as username and password