Configure Kofax Express
In this guide we will configure in Kofax Express a Job to process scans that are invoice, in this simple scenario we will extract just 3 fields: InvoiceNo, Date, Customer
1 - Create a new Job
In the main menu click on New Job
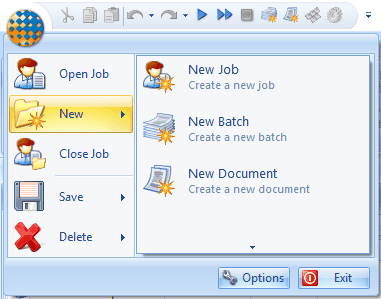
Now pen the Job Setup tab, where you have to apply some configurations.

In the section Destination make sure that the selected Job is Scan Invoices.
In the section Export uncheck the option Delete batch after export and change the Connector to Multipage.
In the section Associated Scan Profile choose FolderScan.
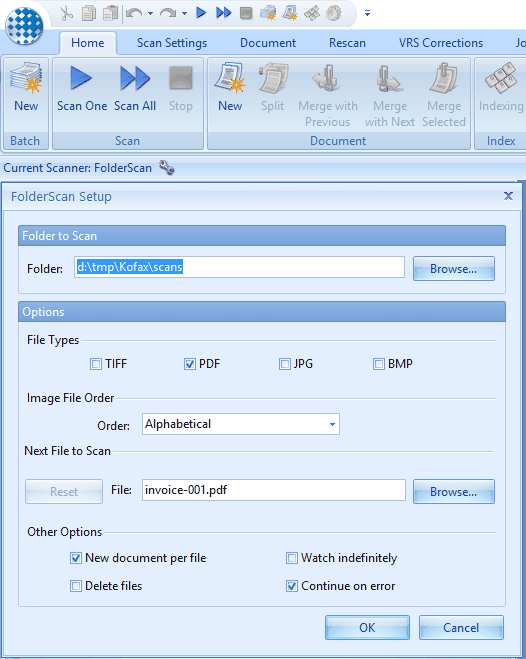
In the toolbar you see now that the Current Scanner is FolderScan, please click in the configuration icon and put the path that will contain the scans, please save this path for future reference.
2 - Configure the Export Format
In the Job Setup tab, click on the icon to configure the Multipage connector.
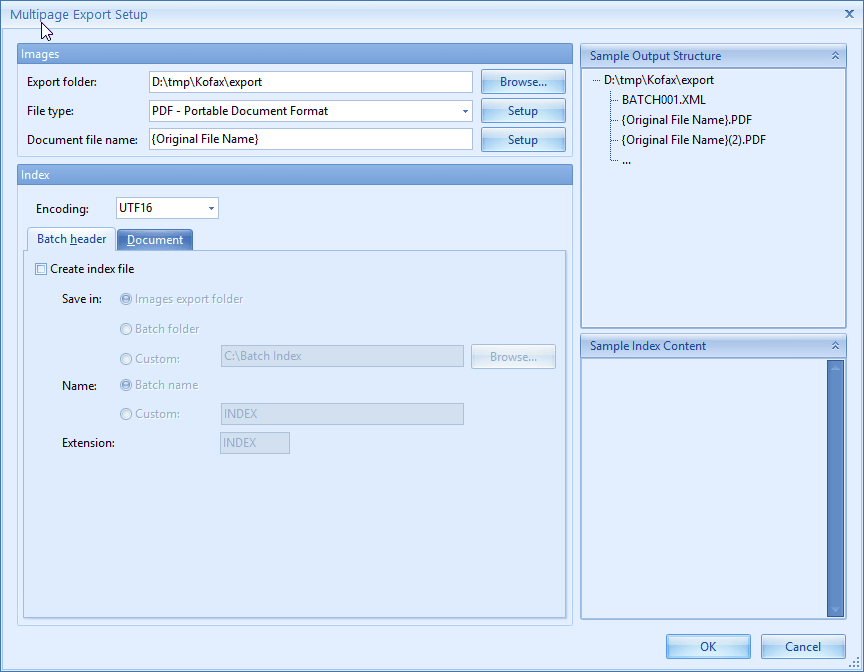
Here apply the following settings:
Export Folder: put a path that will receive the ouput of the processing, please save this path for future reference.
File type: select PDF
Document file name: put {Original File Name}
You can deselect the Create index file option
Now open the Document tab
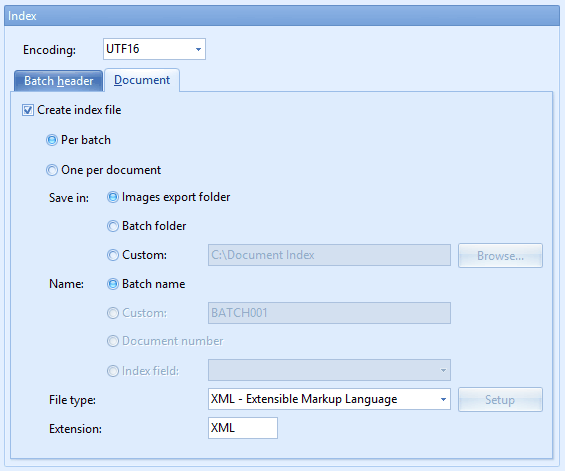
Here check the Create index file option and choose Per batch.
In Save in choose Images export folder
In Name leave Batch name
In File type choose: XML
3 - Define the fields
We will define now 3 fields that will be extracted from the invoices: InvoiceNo, Date, Customer. Open the Index Setup Tab and here click in New button in the Index Fields section.
Give the name InvoiceNo to the new field, select Single line as Type, in Zonal Recognition select Template Mode. In the same way create the Customer field.

Now we will create the Date field with a validation.

In the validation put the following recognition pattern: DD"/"MM"/"YYYY
Use same name for fields and extended attibutes
The extracted informations will be stored in extended attributes of a Template configured in LogicalDOC. For this reason you must have a perfect match between the name of the fileds configured in Kofax Express and the name of the extended attributes configured in the Template in LogicalDOC.
4 - Create a new Batch
Open the the Home tab of the ribbon bar and click on the New button in the Batch section, this will create a new batch and a new row will appears in the Batches window.
Now put your scans in the folder you configured in Step 1 and then click on Scan All button in the Scan section.
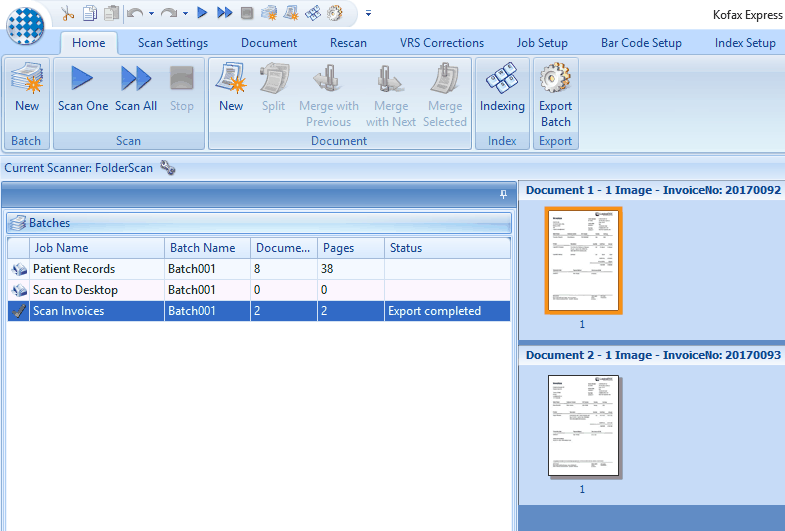
Now the program processes the scans folder and at the end in the right panel you will see all the documents loaded in the batch, in this case they are invoices.
5 - Define the Zones
After your scans are loaded, you have to define the recognition zones, to do so open the Home tab and click on the Indexing button. In the next panel you see a preview of the first scan so press the Draw Zone button an draw the zone for each one of the fields.

When you have defined the zones click on the Next document arrow button and do the same fo all the following documents.
6 - Export the Batch
Click again the Indexing button to return to the batches visualization, in the batches list right click on the current batch and choose Start Export.
Kofax Express extracts all the fields and will produce it's output in the path you confiured in Step 2. It is the same folder that will be monitored by the LogicalDOC Kofax Bridge.


