
Access Control

Instead of assigning access rights to each user individually(that in any case is also supported), we suggest administrators to assign permissions to groups, what in other systems you may see as "roles". 

Role-Based Access Control (RBAC)

Role-Based Access Control works by assigning permissions to roles (like admin, author, or guest) rather than to individual users. Employees are then placed into these roles, automatically inheriting the exact access rights needed for their specific job functions. To understand how RBAC works, you can break it down into these core components.

1

Permissions

Specific actions allowed on a resource like a folder or a document, such as read, write, edit.

Complete list of Permissions

PermissionApplicable ResourcesActions Allowed on Resources
Readallaccessing and using
Previewdocumentdisplaying in the interface
Printdocumentprinting
Downloaddocument, folderextracting from the platform
Emaildocumentincluding the resource in an email
Writeallediting
Addfolderadding new elements inside
Securitydocument, foldermanaging security policies
Immutabledocumentenabling immutability
Passworddocumentprotecting with a password
Deletealllogically removing
Movedocument, foldermoving into another location
Renamedocument, foldermodifying the name
Custom IDdocumentediting the Custom ID
Revisiondocumentediting the Revision
Importfolderimporting from .zip archives or other source
Exportfolderexporting to .zip archive or other target
Signdocumentdigitally signing
Archivedocument, folderarchiving or inserting into an export archive
Workflowdocumentlaunchin a new workflow instance
Calendardocumentcreating a calendar event
Subscriptiondocument, foldersubscribing other users to the issued alerts
Automationdocument, folderinvoking an automation routine
Reading requestdocumentsending a reading request
Storefolderchanging the default store

Admins can do everything

The users in the admin group always have full permissions on all the resources.

Everywhere you have an object sensible of security policies like folders or documents, you can grant permissions to groups.

2

Groups (roles)

Collections of permissions created to match specific job responsibilities (e.g., an "Accountant" role has permission to read invoices and create payrolls).

More details about Groups 

3

Users

The system accounts assigned to the groups. A user may be assigned to one or more groups.

More details about Users 

Scalability and Security

The main advantage of this model is scale and security. When an employee is hired or changes departments, you simply assign them a new role. If a permission changes (for example, allowing a manager to approve software purchases), you just update the manager role, and everyone with that role gets the new access instantly.
Groups and Roles

In LogicalDOC, a group represents both a collection of users logically related each other and the concept of "role" as a collection of permissions to match specific responsibilities.

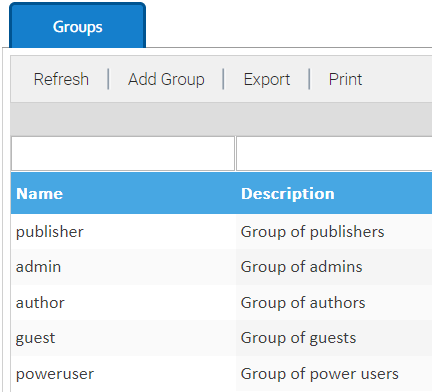
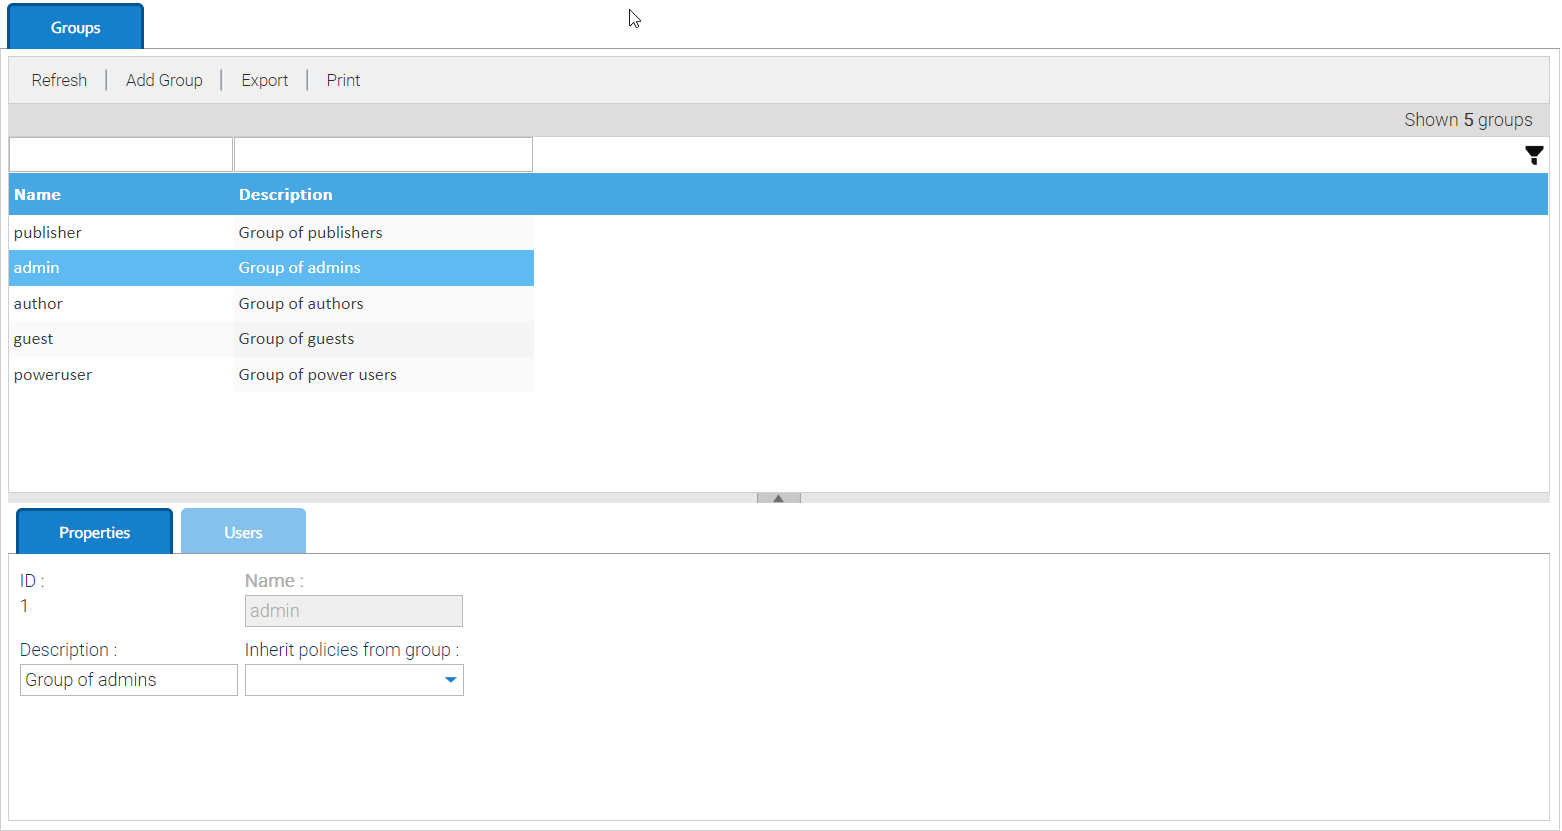
The Groups panel shows the list of all groups currently existing into the system.

To add a new group, you have to click on Add Group button, and then it is sufficient to specify a name, a description and a parent group. The new group will inherit all the permissions already assigned to the parent group.

The administrators can delete a group by right-clicking the group item and then selecting the Delete context menu item.

By selecting a group item, you can see all the group's details under the list. Here you can edit the group's data.

group window
 

Inheriting security policies from another group

To inherit the security policies from another existing group, you can just select that group in the Inherit policies from group drop-down list and save. If you do so, all the current security policies of the selected groups against folders, documents and menus will be replicated in the currently edited group.

If you create a new group without inheriting the security from another one, then that group will initially have no permissions.

Warning

The group is a structural element that is used to assign access privileges. Use groups for the purpose of facilitating the configuration of privileges and not to carry out simple groupings of users. Introduce new groups only when it is truly necessary.

Default groups

Each LogicalDOC installation comes with the following default groups:

  • admin: the users in this group have access to everything in LogicalDOC. You cannot delete this group.
  • poweruser: a sample group with limited access to administration. You can delete this group.
  • author: a sample group with R/W permissions in the Default workspace. You can delete this group.
  • publisher: the users in this group can see the documents marked as unpublished. You cannot delete this group.
  • guest: a group with just read-only permissions in the Default workspace. The read-only users will also be automatically assigned to this group. You cannot delete this group.

Users

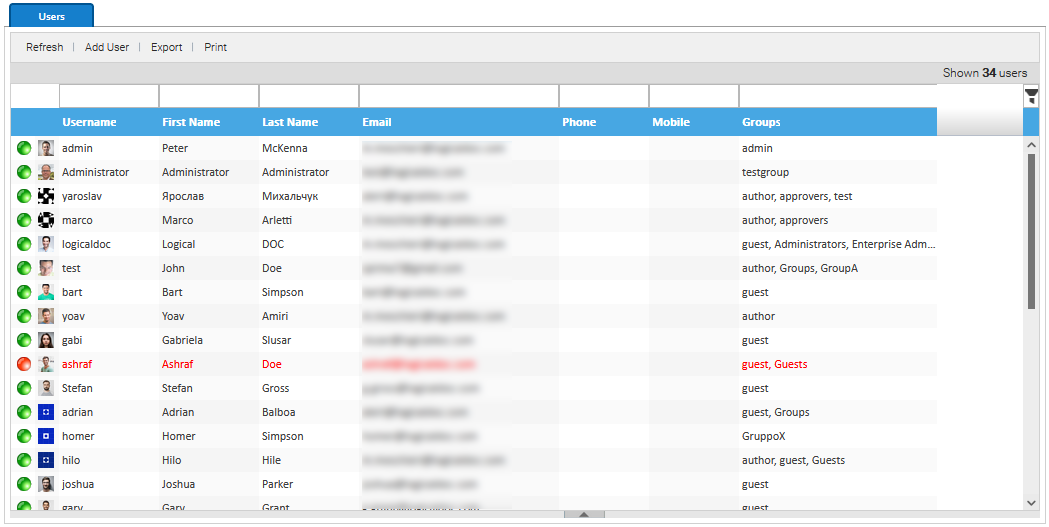
This panel shows the list of all users currently existing into the system.

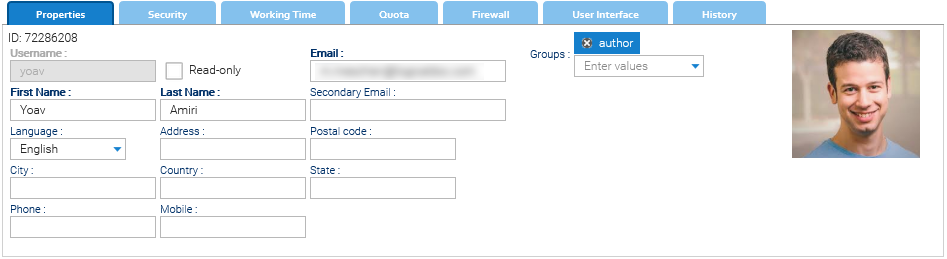
To add a new user, you have to click on Add User button and then fill all the required data:

  • Username
  • Email
  • First Name
  • Last Name
  • Language
  • Group

Each user can belong to one or more groups, the security policies are always expressed in relation to the groups and/or specific users.

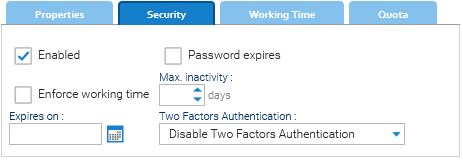
There is also the Password expires option that allows to assign a time to live to the password. After the expiration days, when the user tries to access to the system, a warning message appears inviting him to change his password. The user must type his old password and then type a new one.

When you click the Save button (assuming all the required information have been correctly entered), a new user is created and added to the database. Then he receives a welcome e-mail containing the username and password created by the system. If you want to force a specific password, just right click and select Change password.

By selecting a user item, you can see all the user details under the list. Here you can edit the item's data.

Permissions inheritance

The security model implemented by the system allows you to express security policies for various permissions. These security policies are expressed in relation to groups and users, so each user inherits the access privileges assigned to all groups he belongs to

Avatar

LogicalDOC tries to use the Gravatar service to get an image representing the user, but you can change it an any time by right-clicking on the image and uploading your file.

Legal representative

Those users marked as Legal representative will be required to acknowledge changes in the legals like EULA, Support terms and conditions etc. Each time a new legal gets published, those users will be guided to read and confirm it before logging into the system.

Security

In this panel, there are various security aspects related to the user.

  • Enabled:  if not enabled, the user cannot enter the system
  • Password expires: if the password of the user expires after a period
  • Max. inactivity: optional maximum number of days since the last interaction, after which the user is marked as disabled
  • Expires on: a date, after which the user is no more admitted to enter the system
  • Two Factors Authentication: what two factors authentication must be implemented for this user
  • Enforce working time: if the system must allow the user to login during his working time only (see the dedicated tab)

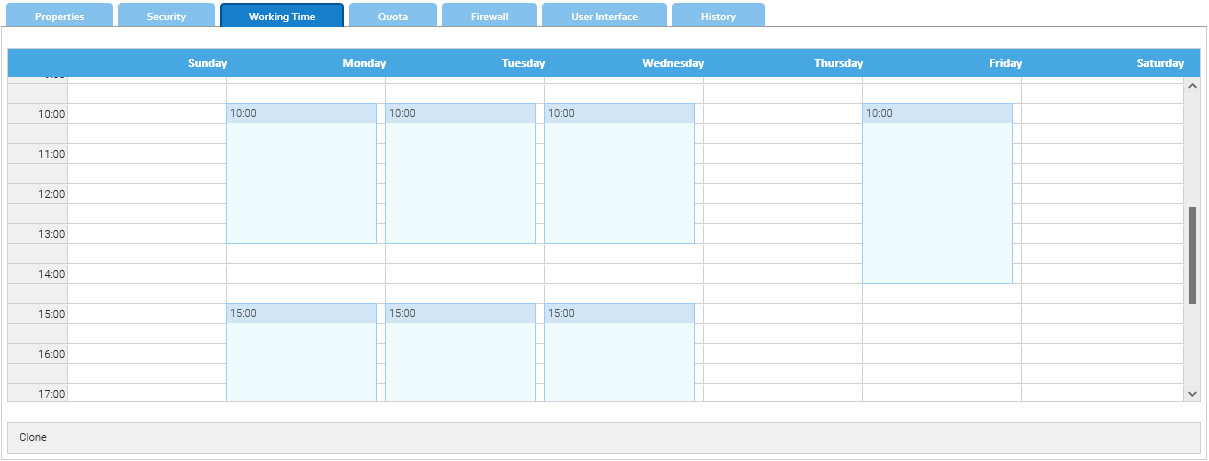
Working Time

For every user, you may define the working hours of each day in the week.

Just fill the grid like you do on a normal web calendar, for every block you can also give an optional label.

If you want to replicate the same working time for other users, just click on Clone.

Quota

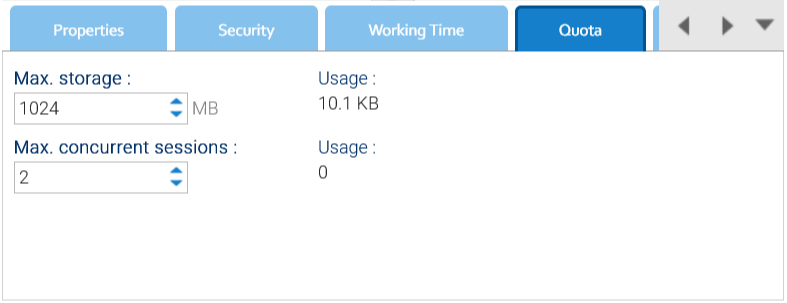
In this panel, you can define the user's quota.

Max storage: the maximum total size(MB) of the documents stored by the user

Max concurrent sessions: the maximum number of sessions the user can open at the same time

Firewall

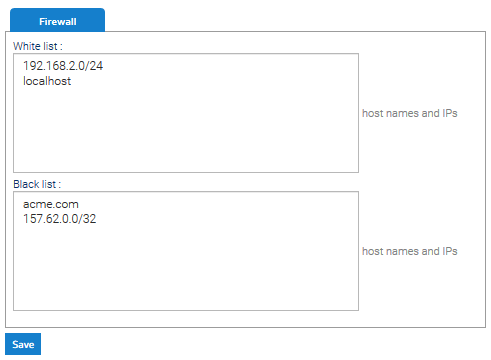
In the Firewall panel, It is possible can define allowed and blocked locations (hostnames and IP addresses) from which the selected user is permitted or denied access

Read-only users

You can mark a user as read-only, if you do so the user will be automatically assigned to the guest group.

A read only user acts like a regular user but in spite of the security policies you may configure, he will not able to:

  • Create / edit / delete / move files
  • Create / edit / delete / move folders

In few words, this kind of users can only consult the platform but cannot fully interact with it.