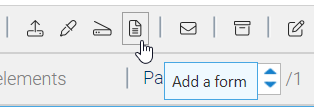
Scan a Document

You can upload into the system a scan from a scanner connected to the computer by clicking on the Scan a document icon.


Webstart

The scan function is implemented as a Java Application and if your PC runs Windows, you have to install the LogicalDOC Webstart launcher

Now, depending on the configuration of your system you could be required to download a .jar file and execute it (it would be sufficient to double-click on it in case Java has been associated with that extension) or this process could be automated by the LogicalDOC Webstart launcher.

At the end the app is launched, and you can see its window.

Here perform the following actions:

  • click the new scan button (white page icon)
  • choose, through the drop-down menu, one of the scanning options:
    • delete the previous scans, and consider only the following ones
    • append the following scan to those performed previously (recommended if the user wants to create a single document consisting of several scans)
  • click OK
  • the system shows the list of the scanners connected to your computer so you can choose one and click Select
  • now your scanner's driver starts and the image is loaded in the LogicalDOC window
  • you can rotate it and, if you appended more scans, you can scroll through the images with the appropriate arrows buttons.
  • if the scanning is correct, click on the upload button (green arrow) to send the document into the system
  • choose the document's name and format (PDF, JPG or TIFF).

The document is created in the current folder, and you can see it into the documents list grid.

Adding a Form

If you have the write permission in the current folder, you can create a new PDF document by filling the fields with one of the available forms.  To do so, click on the Add a form icon and select one of the available forms.

Click on Save to confirm, and a new dialog box appears with the fields of the form.

Here you can fill the fields and confirm. The new PDF is now created inside the current folder, the fields are rendered according to the form's design.

Changes in the metadata

Anytime you change the metadata of this new document, the same changes will be automatically reflected in the content too.
 

Digitally signing a document

To digitally sign a document, you have to set up your certificate first. See here how to generate or load your own digital certificate.

Signing a document

Make sure to have the Sign permission, then open the Signature tab of the document's properties panel.

  1. Type a comment in the Reason box.
  2. Click on the Sign now button.

Your signature is displayed on the Signature tab. It is composed of your certificate, your organization's certificate, and the expiration date of your certificate.

You will also see a new red icon indicating that the document was signed.

You can now click on the red icon to open the signed version of the document.

Verifying the Signature of the PDF File

To verify the signature of the PDF, you need to:

  1. Install the public root certificate available from the Root Certificate section of the Signature tab: Click on the Download the public root certificate for your PDF viewer link to download the certificate.
  2. Follow your operating system's usual certificate installation steps.
  3. Download the signed PDF file by clicking on the red icon that appears in the document's record

Visual positioning

If in the signature form you also choose the Visual positioning option, you will be asked to position and size the signature area inside the document.

LogicalDOC Data Source

Adding an event to the Calendar

LogicalDOC allows you to add calendar events, the calendar is a useful tool to coordinate activities among your colleagues.

Each event in the calendar may be associated to one or more documents, so select some documents and click on the toolbar icon New calendar event

This will open the event's detail window:

Title: name of the event, as displayed in the shared calendar

Description: a description of the event

Begin: when the event will occur

Expiration date: if the event has a duration, this field shows the expiration date

Frequency: for those events that are recurrent, here you can put the repetition frequency

Status: optional field you might use to track the completion status or the cancellation of the event

Participants: the users that will have to participate in the event

Documents: any documents associated to the event

Reminders

A set of reminders can be set so that all the involved people will be notified at the right time.

Document Aliases

Aliases are pointers to real documents that you may use to distribute the same content in different folders with different security policies, you may have more than one alias that point to the same real document.

Creating an Alias

From the list of documents to select the document you want to create an alias and then choose the Copy context menu item. This will put the current selection in the clipboard.

Now, in the folders tree, right-click on the destination folder and select the Paste as alias item.

The alias appears as a normal document, and you can perform on it all the operations allowed in the folder.

Info

All the operations performed on this alias will be executed on the original document.

All the modifications done on the real document will propagate to all the aliases.

Aliases don't cause increases in the size of storage.

Deleting an Alias

Just right-click on the alias and choose Delete. This deletes the alias only, not the real document.