")
")
")

Install third-party Software on macOS
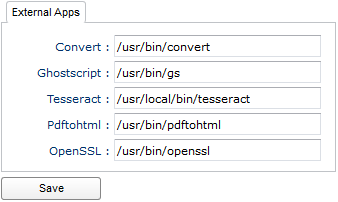
To have additional features like the full preview, you need to install some external components.
LibreOffice
- Please download and install LibreOffice in your system: https://www.libreoffice.org/download/
- Setup the application following the instructions at https://www.libreoffice.org/get-help/install-howto/os-x/
- Create a symbolic link from the command line (Terminal server) using the instructions below
$ cd /Applications/LibreOffice.app/Contents/MacOS
$ ln -s soffice soffice.bin
XCode
Please download and install XCode in your system: https://developer.apple.com/xcode
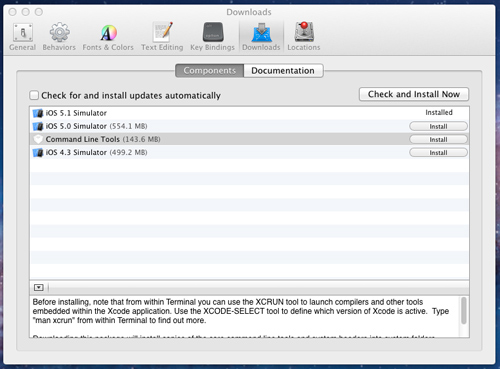
After the installation of XCode you also need to install the optional package 'Command Line Tools', so proceed as follows:
- Launch XCode
- Open the menu XCode->Preferences->Downloads
- Select the 'Components' tab
- Install 'Command Line Tools' item
Once you have your command line tools installed you can quit XCode.
Homebrew
Please download and install Homebrew in your system: http://brew.sh/
You can install Homebrew by executing this command:
$ ruby -e "$(curl -fsSL https://raw.githubusercontent.com/Homebrew/install/master/install)"
ImageMagick
You have to install and configure ImageMagick (rel 6.6 or greater). LogicalDOC uses ImageMagick to manipulate images for previewing.
To install it on MAC, execute this command:
$ brew install imagemagick
GhostScript
LogicalDOC needs to print documents to a virtual device sometimes when performing barcode recognition. In general in GhostScript is a package installed by default.
To install it on MAC, execute this command:
$ brew install ghostscript
Pdftohtml
This is a converter from Pdf to HTML format, LogicalDOC makes use of this utility to prepare the documents for annotations. Without this you will not be able to insert annotations inside the content of the document.
To install it on MAC, execute this command:
$ brew install pdftohtml
Tesseract
Tesseract is an Open Source OCR engine adopted by Google. This package represents the basic OCR engine available on LogicalDOC and it is required only if you want to extract texts inside images. Read this Mini How-To on how to install it.
However, to install it on MAC, execute this command:
$ brew install tesseract
OpenSSL
OpenSSL is the most known Open Source SSL implementation. This package is required to sign documents server-side.
To install it on MAC, execute this command:
$ brew install openssl
Antivirus ClamAV
LogicalDOC is integrated with the ClamAV antivirus to check if a submitted document is infected, the the best way is to install ClamXav, a free graphical front end that includes the clamav software: http://www.clamxav.com. Once installed execute it and it will guide to in the installation of the ClamAV antivirus, at the end check to have the command clamscan installed in your system, probably in /usr/local/clamXav/bin/clamscan
AcmeCadConverter
This utility is used to manage AutoCAD preview and conversion. The LogicalDOC distribution cannot include a licensed version of this utility so the preview will contain a watermark, to remove this watermark you will have to purchase a license from here: http://www.dwgtool.com/cadconvert.htm
Once you have a valid license key please do the following in LogicalDOC:
- Stop LogicalDOC
- Open the text file conf/context.properties
- Locate the property acmecad.key and put here your license key
- Save and start LogicalDOC
As this is a Windows application, you need to install wine in your MAC to use it so follow this procedure:
1. Go to the XQuartz homepage, download XQuartz, and install it.
2. Install wine by executing these commands:
$ brew install wine

$ sudo ln -s /usr/local/Cellar/wine/1.6.2/bin/wine /usr/local/bin/wine
The path /usr/local/Cellar/wine/1.6.2/bin/wine is where your wine was installed, it may be different in your system
To check if all is ok, execute this command:
$ wine /LogicalDOC/acmecad/AcmeCADConverter.exe