Kofax Bridge

Kofax Express es una aplicación de digitalización de documentos orientada a lotes fácil de usar para Windows capaz de escanear a alta velocidad con OCR Zonal y indexación en tiempo real. Puede encontrar más información aquí: http://www.kofax.com/document-scanning-software

El Kofax Bridge es una herramienta de integración proporcionada por LogicalDOC que procesa la salida de Kofax Express e importa sus escaneos así como los campos extraídos en el repositorio central. La combinación de Kofax Express y Kofax Bridge añade a LogicalDOC buenas capacidades de OCR Zonal.

Instalar y Configurar Kofax Express

Después de la instalación de la aplicación Kofax Express, debe crear una o más tareas de análisis configuradas de una manera que pueda ser procesada correctamente por Kofax Bridge.

>>Lea esta guía que explica cómo configurar un trabajo simple para procesar facturas<<

Instalar y Configurar Kofax Bridge

Descargar el instalador desde el sitio de download. Para instalar LogicalDOC Kofax Bridge descomprima el archivo zip, luego abra una ventana de terminal y ejecute el comando desde la línea de comandos:

$ java -jar logicaldoc-kofax-installer.jar

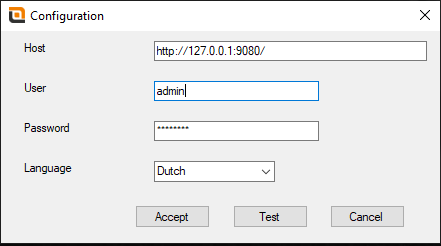
Durante la configuración se le pedirá que coloque los parámetros de conexión a su instalación LogicalDOC.

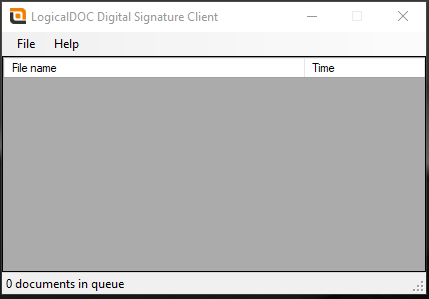
En Windows, después de la instalación tendrá un nuevo servicio de Windows y en la barra de estado aparecerá un nuevo icono.

Para configurar los lotes de importación, haga clic con el botón derecho en el icono de LogicalDOC Kofax y elija Configuración. Aparecerá una consola que le permitirá configurar los diferentes lotes a monitorizar.

Para cada lote usted tiene que especificar:

  • La ruta local donde Kofax Express exporta la salida de este lote
  • Una carpeta de destino en LogicalDOC que recibirá los escaneos
  • La plantilla que define los mismos campos extraídos por Kofax Express

Es importante señalar que cada lote está asociado a una plantilla y que los nombres de los atributos de esta plantilla deben coincidir con los campos configurados en Kofax Express, de esta manera las informaciones extraídas se almacenarán en los atributos extendidos de los documentos.

En este punto, el puente está completamente configurado y en funcionamiento, por lo que puede trabajar con la aplicación Kofax Express y de vez en cuando el Kofax Bridge importará en LogicalDOC sus escaneos con los metadatos extraídos y almacenados como atributos extendidos.


Configure Kofax Express

In this guide we will configure in Kofax Express a Job to process scans that are invoice, in this simple scenario we will extract just 3 fields: InvoiceNo, Date, Customer

1 - Create a new Job

In the main menu click on New Job

Now pen the Job Setup tab, where you have to apply some configurations.

In the section Destination make sure that the selected Job is Scan Invoices.

In the section Export uncheck the option Delete batch after export and change the Connector to Multipage.

In the section Associated Scan Profile choose FolderScan.

In the toolbar you see now that the Current Scanner is FolderScan, please click in the configuration icon and put the path that will contain the scans, please save this path for future reference.

2 - Configure the Export Format

In the Job Setup tab, click on the icon to configure the Multipage connector.


Here apply the following settings:

Export Folder: put a path that will receive the ouput of the processing, please save this path for future reference.

File type: select PDF

Document file name: put {Original File Name}

You can deselect the Create index file option

Now open the Document tab

Here check the Create index file option and choose Per batch.

In Save in choose Images export folder

In Name leave Batch name

In File type choose: XML

3 - Define the fields

We will define now 3 fields that will be extracted from the invoices: InvoiceNo, Date, Customer. Open the Index Setup Tab and here click in New button in the Index Fields section.

Give the name InvoiceNo to the new field, select Single line as Type, in Zonal Recognition select Template Mode. In the same way create the Customer field.

Now we will create the Date field with a validation.

In the validation put the following recognition pattern: DD"/"MM"/"YYYY

Use same name for fields and extended attibutes

The extracted informations will be stored in extended attributes of a Template configured in LogicalDOC. For this reason you must have a perfect match between the name of the fileds configured in Kofax Express and the name of the extended attributes configured in the Template in LogicalDOC.

4 - Create a new Batch

Open the the Home tab of the ribbon bar and click on the New button in the Batch section, this will create a new batch and a new row will appears in the Batches window.

Now put your scans in the folder you configured in Step 1 and then click on Scan All button in the Scan section.

Now the program processes the scans folder and at the end in the right panel you will see all the documents loaded in the batch, in this case they are invoices.

5 - Define the Zones

After your scans are loaded, you have to define the recognition zones, to do so open the Home tab and click on the Indexing button. In the next panel you see a preview of the first scan so press the Draw Zone button an draw the zone for each one of the fields.

When you have defined the zones click on the Next document arrow button and do the same fo all the following documents.

6 - Export the Batch

Click again the Indexing button to return to the batches visualization, in the batches list right click on the current batch and choose Start Export.

Kofax Express extracts all the fields and will produce it's output in the path you confiured in Step 2. It is the same folder that will be monitored by the LogicalDOC Kofax Bridge.

Cliente de Firma Digital

LogicalDOC proporciona un cliente que le permite firmar digitalmente sus documentos directamente desde su escritorio.

El Cliente de Firma Digital para su PC con Windows está disponible en el sitio web de descarga.

Configuración

Una vez instalado, abra su Cliente de Firma Digital y abra el menú Archivo > Configuración.

En el formulario de configuración tienes que poner la siguiente información:

  • URL: la dirección de la instancia de su sistema
  • Nombre de usuario: el nombre de usuario que utiliza para iniciar sesión en el sistema
  • Contraseña: la contraseña que usa para iniciar sesión en el sistema
  • Idioma: el idioma de los documentos que almacenará en el sistema

Confirma los parámetros presionando Aceptar y eso es todo. Por supuesto, debe configurarlo una sola vez, ya que toda esta información se guarda en su disco duro. En cualquier momento puedes volver a abrir el formulario de configuración y cambiar lo que quieras.

Firmar un documento

Para firmar un conjunto de archivos con uno de los certificados instalados en su máquina con Windows, simplemente inicie el cliente y arrastre y suelte unos documentos en la ventana de la aplicación.

Se le pedirá que elija uno de los certificados disponibles:

El siguiente paso es elegir la carpeta de destino para almacenar los documentos firmados:

Ahora todos los archivos están firmados localmente y cargados en su instalación de LogicalDOC.

Si ingresa a la interfaz web verá sus nuevos archivos y en la pestaña Firma el certificado utilizado para firmarlos: