LogicalDOC is an entirely web-based application for archiving documents. Once installed and connected to the Internet or your private network, you can easily use the program with a browser without having to install additional software.
This manual is dedicated end users that will access the system for their document management needs. It will describe all of the LogicalDOC features.
LogicalDOC Scanner
LogicalDOC Scanner 1.1.1 is a Windows desktop application for scanning paper documents, preparing PDF files, and exchanging documents with a LogicalDOC repository. This guide introduces its principal functions and explains the typical document acquisition workflow.
Requirements and Installation
Microsoft Windows and .NET Framework 4.7.2 or later.
A compatible WIA or TWAIN device for physical scanning.
LogicalDOC 9.3 with the Scanner feature enabled in the server license for repository integration.
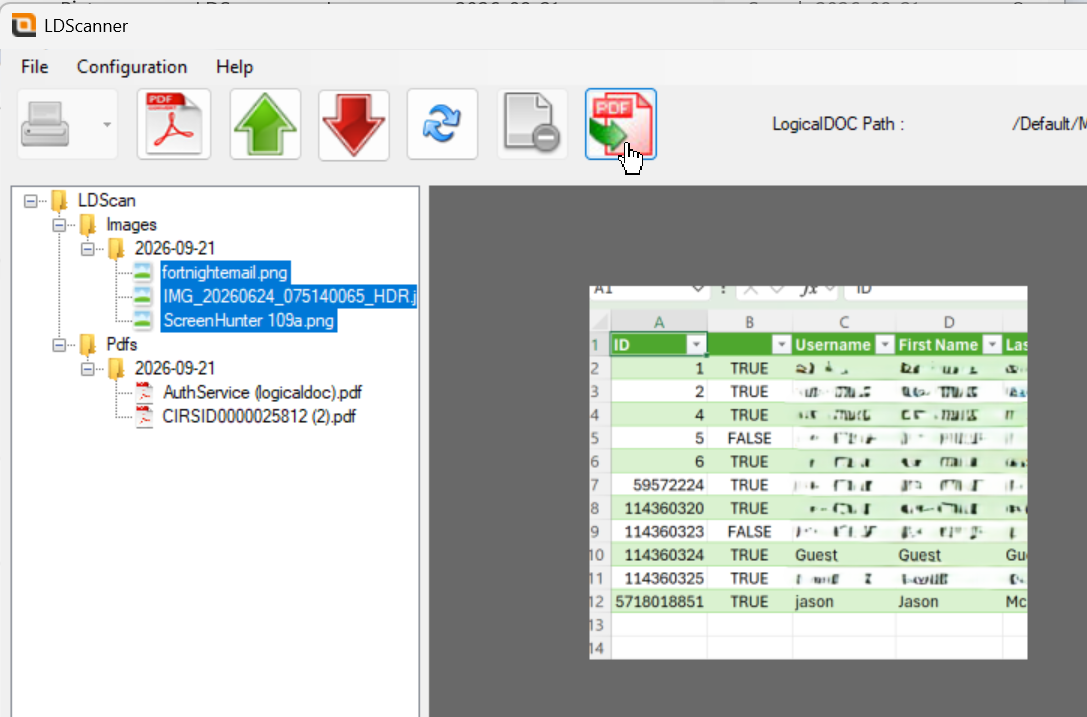
The main window brings together local file navigation, document preview, scanning commands, PDF processing tools, and repository transfer operations. Images and PDF documents are organized in separate local folders. Select a document to inspect it before editing or uploading; multipage PDF preview includes page navigation and zoom controls.
LogicalDOC Scanner main interface
Configure the LogicalDOC Connection
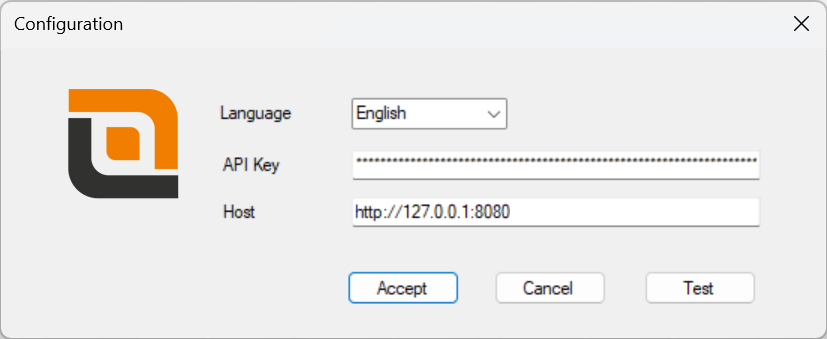
Open the application configuration and enter the LogicalDOC server address and the API key for the account used to access the repository. Use the connection test to verify the settings. Scanner 1.1.1 uses API key authentication and the LogicalDOC 9.3 APIs; the Scanner feature must be enabled in the server license.
The configuration also includes a Language selector for choosing the application interface language.
Server connection configuration
Scan Paper Documents
LogicalDOC Scanner supports compatible WIA (Windows Image Acquisition) and TWAIN scanners. You can acquire pages from a flatbed or an automatic document feeder (ADF), depending on the device capabilities.
Connect the scanner and select the acquisition command.
Choose the available scanning interface and device settings.
Load the paper into the flatbed or feeder.
Start acquisition and review the resulting files.
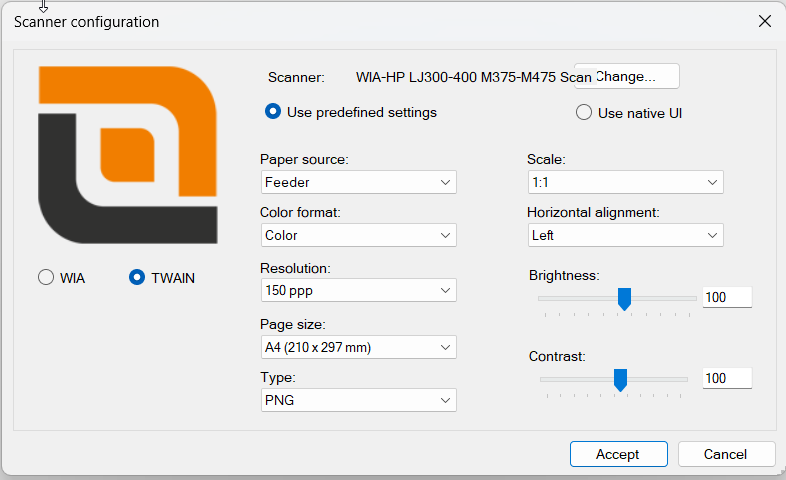
Depending on the selected driver, settings may include resolution, paper size, color mode, brightness, contrast, scaling and alignment. Where supported, the manufacturer's native interface provides additional device-specific options and page preview.
Example scanner acquisition settings
Batch Scanning
For multipage acquisitions, choose whether to save scanned pages as individual images, combine the acquired batch into one multipage PDF, or create separate PDF documents from the scanned pages. ADF scanning can process successive pages when supported by the device.
Create and Edit PDF Documents
Create PDFs from Images
Select one or more images and convert them into a PDF. Multiple images can be combined into a single multipage document. PDF preparation options include CCITT Group 4 compression for black-and-white scanned content and fitting content to A4 page format.
Append Images to a PDF
Select an existing PDF and use the image-append operation to add one or more image files as additional pages. This is useful when a document needs extra scanned pages or supporting material.
Remove PDF Pages
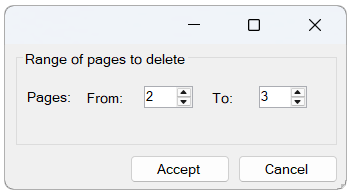
Use the page removal command to specify a page range to delete from an existing PDF, for example to remove blank or unwanted scanned pages. Review the resulting document before transferring it to the repository.
Removing unwanted PDF pages
Preview and Print
Use the integrated preview to inspect images and navigate PDF pages with zoom controls. PDF documents can also be printed from the application.
Upload and Download Documents
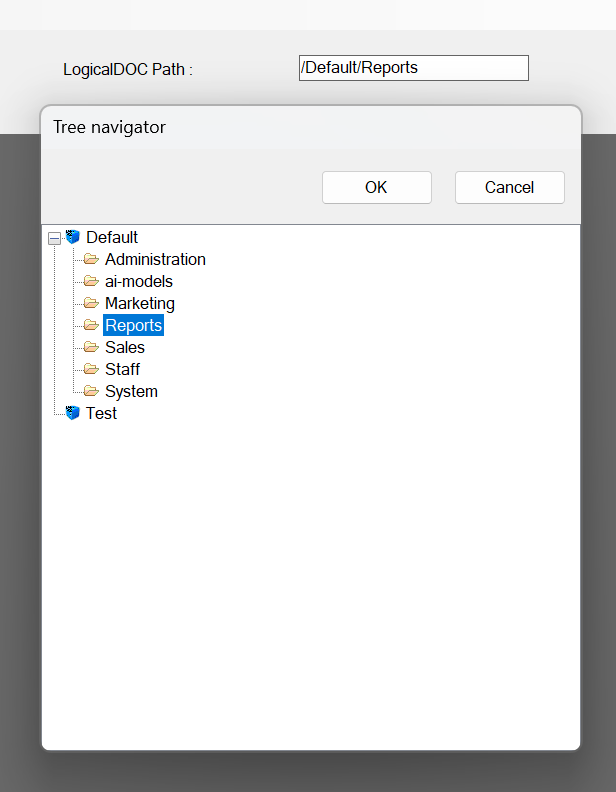
Once a scanned image or PDF is ready, select the local file and start the upload operation. The built-in remote folder navigator lets you choose the destination in the LogicalDOC repository. The application displays the selected destination path and reports the upload result.
You can also download documents from the connected repository for local viewing and processing. Repository operations are subject to the connected account's permissions.
Selecting a repository folder
Additional Information
LogicalDOC Scanner 1.1.1 also improves the display of the repository destination folder, provides an Open Folder in File Explorer action, and includes translation and log management fixes.
The Impersonation feature allows a user to operate on behalf of another user, provided that explicit authorization has been granted.
This mechanism is useful where one user needs to act with the permissions and identity of another.
Authorization Rules
Impersonation is disabled by default.
A user can impersonate another user only if the impersonating user is included in the target user’s Allowed Impersonators list.
To enable impersonation, the target user must configure the appropriate permissions: Navigate to Account > Security > Allowed Impersonators Here, it is possible to define one or more impersonators. Add one or more users to the list of allowed impersonators
Only users included in this list will be authorized to act on behalf of the target user.
How It Works
Once granted access, the allowed impersonator can log in in place of another user.
The core of the Impersonation process is handled during the authentication phase. A user can request impersonation by appending the target username to their own identifier using a special separator: >
Example: giuseppe>admin
In this case:
giuseppe is the authenticating user
admin is the user being impersonated
Authentication Flow
During authentication, the system checks whether impersonation has been requested:
If the username contains >, it is split into:
real username
impersonated username
In the same way, if you connect through an API key you can impersonate someone else by appending his username after the > symbol:
E.g.: If you are giuseppe and your API Key is ld-5fb5898fa9eb99 then you can impersonate admin by using ld-5fb5898fa9eb99>admin
In any case:
The system always authenticates the real user (giuseppe)
If authentication succeeds, impersonation logic is applied
The system attempts to load the target user (admin)
Authorization is verified
All subsequent operations will be taken in the name of the impersonated user
Impersonation Evidence
To verify actions taken by impersonators, select the document and open the History tab. Add the Impersonator column by right-clicking the table header and selecting Columns > Impersonator.
This selection shows if an impersonator performed an action on the document.