
Microsoft Outlook Addin

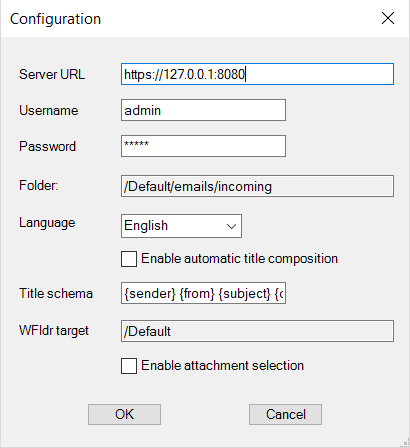
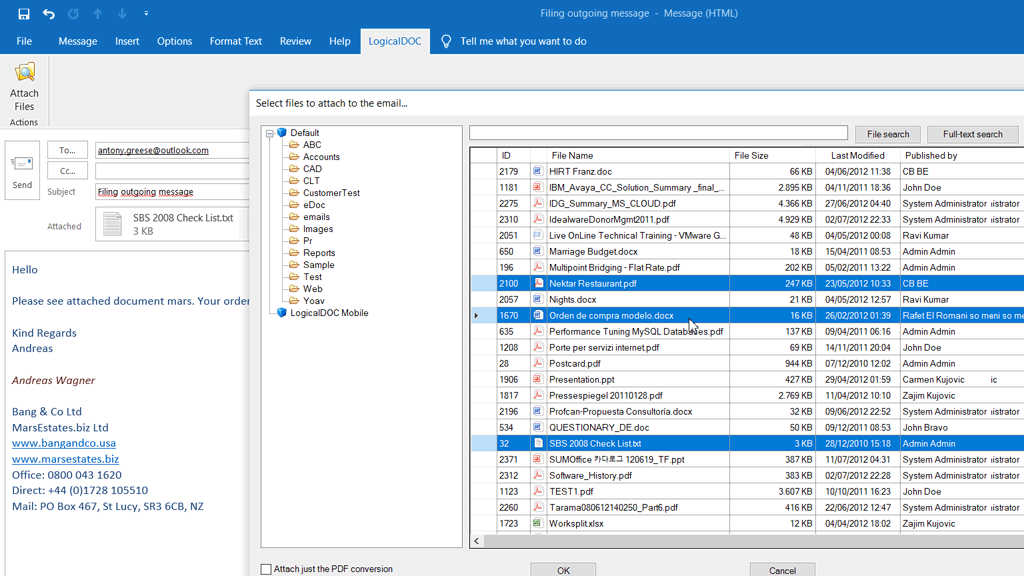
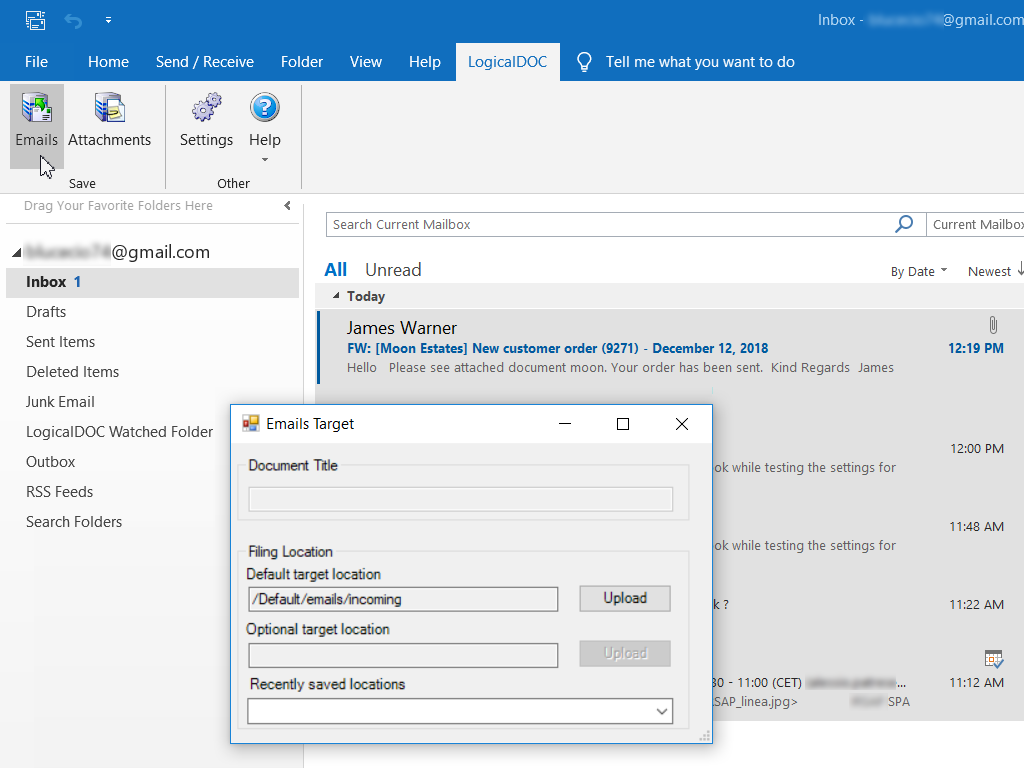
You can archive emails and attachments into the system directly from your Outlook mailer.  In the same way, you can attach to your outgoing emails documents picked from the system.

Pre-requisites

You need Microsoft Outlook.

You have to install in your Windows PC the latest LogicalDOC Outlook Addin available in the download website.

Configure Outlook Addin

Once installed, open your Outlook and note that a new menu now appears in the menu bar, open this menu and select the [Configuration] item.

In the configuration form, you have to put the following information:

  • Username:  the username you use to log in into the system
  • Password: the password you use to log in into the system
  • URL: your system instance address
  • Folder: the destination folder that will receive the emails to be stored
  • Language: the language for the emails you will store into the system

Confirm the parameters by pressing [OK] and that's all. Of course, you need to configure just one time, since all this information is saved into your hard drive. In any moment, you can re-open the configuration form and change what you want.

Import Emails and Attachments

Select all emails you want to import, open the addin menu in the menu bar and select the [Import email] item.

All the selected emails will be imported into the system inside the folder specified in the configuration. Into the system the imported emails will appear as documents with email template.

Once imported all emails will be shared among your team and will benefit of all the features of the Document Management System.

Import Attachments

Sometimes you don't want to import the whole email (both message and attachments) but the attachments only. In this case you can select the emails that contain the attachments and then select the menu item [Import attachments]. In this way all the attachments in the selected emails will be imported into the destination folder.

Attach Documents

You can send documents stored into the system as email attachments. Create a new message composing it as usual and then open the addin tab and select the [Attach Files] action.

Now you can browse the folders and select the desired documents to attach into you outgoing email.

Configure Office Addin

Once installed, open your Office and note that a new button now appears in the menu bar, open this menu and select the Settings item.

In the configuration form you have to put the following information:

  • Username:  the username you use to login into the system
  • Password: the password you use to login into the system
  • URL: your system instance address
  • Language: the language for the documents you will store into the system

Confirm the parameters by pressing OK and that's all. Of course, you need to configure just one time since all this information is saved into your hard drive. In any moment you can re-open the configuration form and change what you want.