Configuring ShareFile API access


1. Visit the ShareFile administration

To allow LogicalDOC to have access to your ShareFile account you have to prepare an API Key first, so enter your DocuSign API console at https://api.sharefile.com administration an click on the Get an API key link.
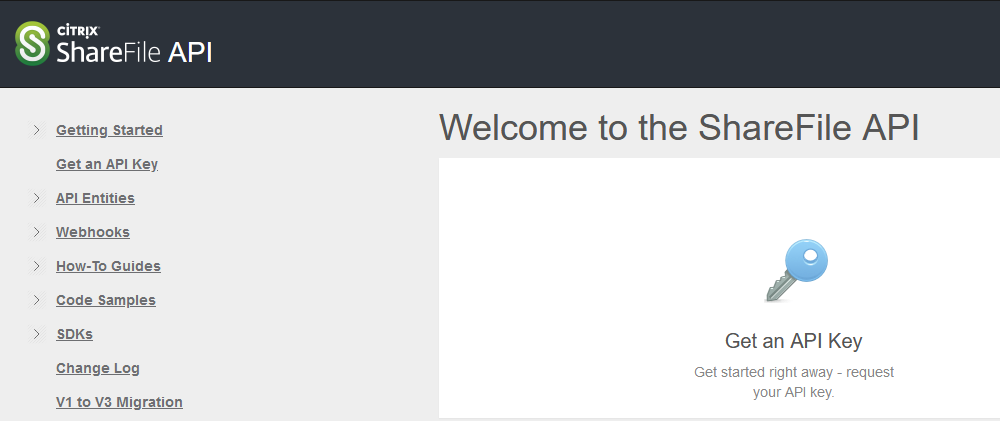
That will lead you to the API Key Generator:
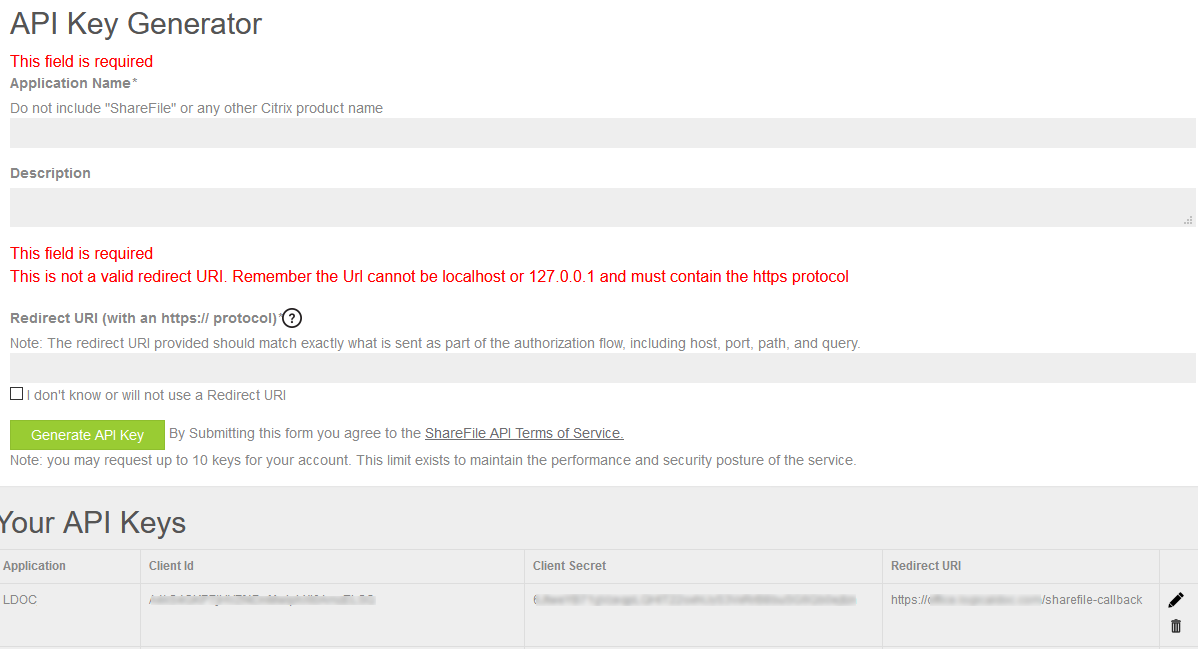
ShareFile key gen

2. Generate the API Key

Fill the Application Name field with whatever name, i.e. logicaldoc

In the Redirect URL field put an url in the format https://yourdomain.com/sharefile-callback where yourdomain.com is the domain that ShareFile will use to contact your LogicalDOC installation.
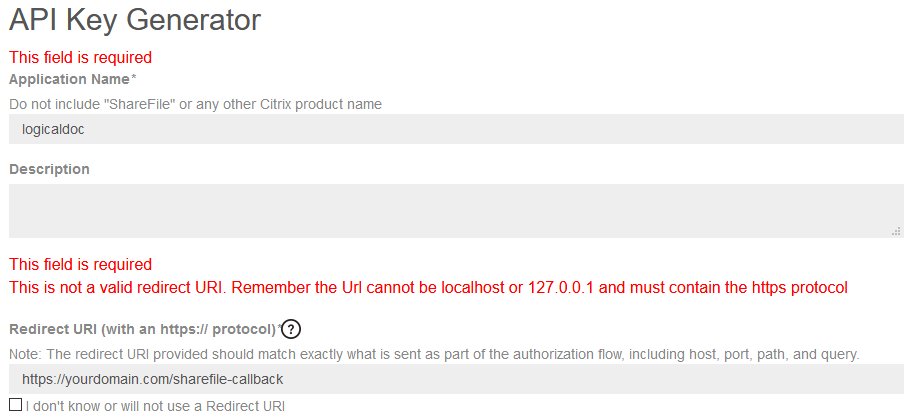
ShareFile key gen

Click on Generate API Key and you will see your new key in the list below, each key defines a Client Id and a Client Secret, you will then use those codes in LogicalDOC.
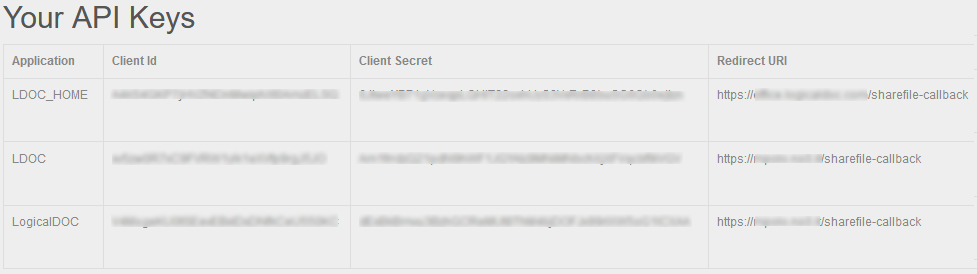
ShareFile api key

HTTPS is manadatory

ShareFiles must communicate with LogicalDOC through the HTTPS protocol, this is a design choice of ShareFile adopted to maximize the security. As a result it is mandatory to make LogicalDOC accessible over the Internet through HTTPS with a valid certificate.

3. Go back to LogicalDOC, and enter the informations

Open the menu Tools > ShareFile > Authorize and paste the information from the key you just created.
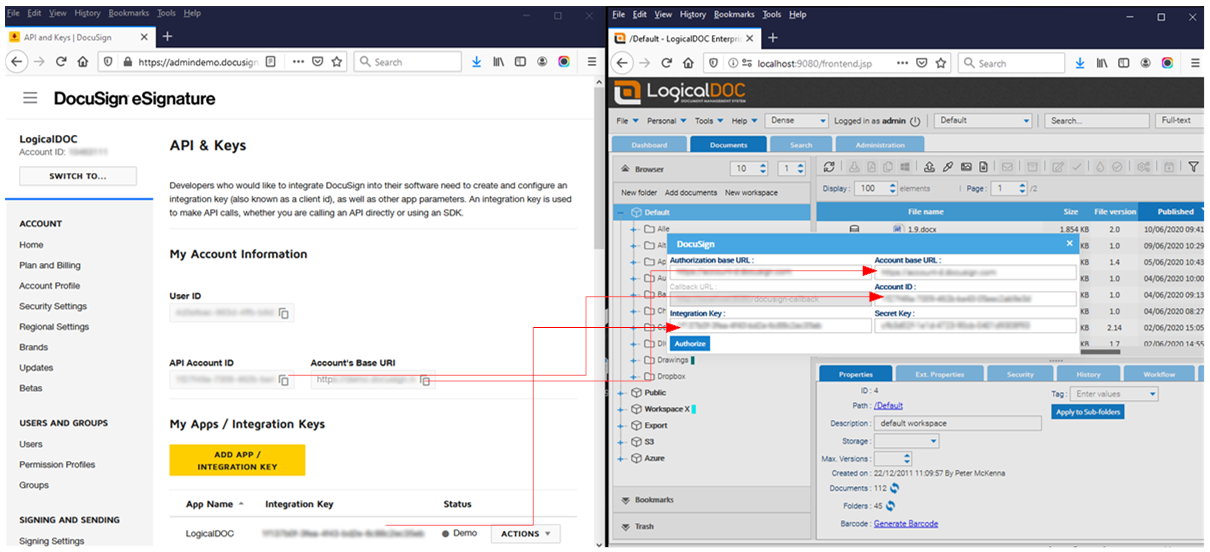
Report Parameter

Then press on Authorize and follow complete authentication in ShareFile.

Callback URL

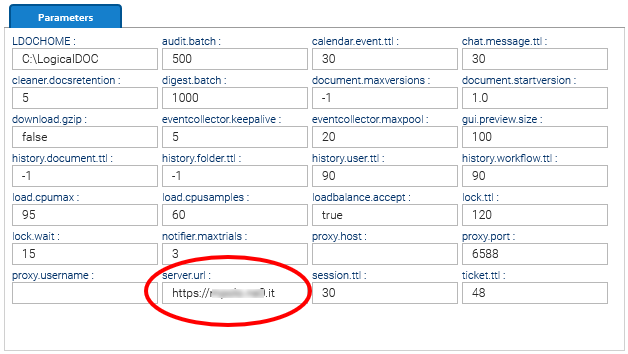
Make sure that the Callback URL you configured in the API key, matches the Server URL you see in Administration > Settings > Parameters > server.url
 

Configuring OnlyOffice

You can create a connection between your OnlyOffice and LogicalDOC. This way, you will be able to use OnlyOffice to edit and create documents stored inside LogicalDOC. OnlyOffice can be used in several ways online and on-premises, but at the time of writing LogicalDOC has been tested against OnlyOffice Document Server for Docker and this guide is based on the official tutorial.

1

Running Docker Image

In a minimum sized machine with Docker version 1.9.0 or later, use this command if to install OnlyOffice Document Server:

sudo docker run -i -t -d -p 8084:80 --restart=always -e JWT_SECRET=my_jwt_secret onlyoffice/documentserver

This command starts the Docker container with standard settings and set up the working port to 8084, feel free to change it at your will.

2

Connecting LogicalDOC with OnlyOffice

The integration with OnlyOffice is implemented by a proper format converter that must be properly enabled and configured.

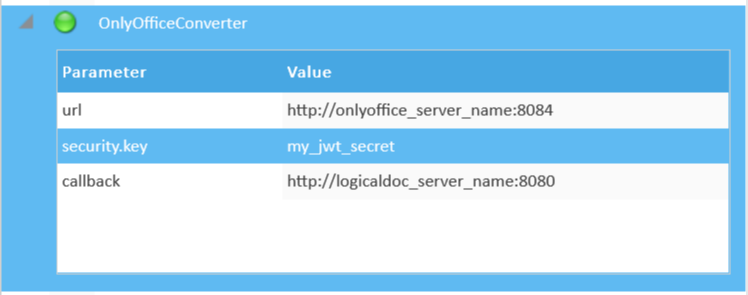
Go to Administration > Import and Export > Format Converters, and here locate the converter called OnlyOfficeConverter, enable it and expand its configuration to accommodate the connection parameters:

  • url:  the address to communicate with your OnlyOffice Document Server
  • security.key: in case of standard setup, you can use my_jwt_secret
  • callback: the address that OnlyOffice Document Server will use to call your LogicalDOC

Then press on Save and you’re done.

Configuring ChatGPT API

Before you can start integrating LogicalDOC with ChatGPT’s API, you need to get an API key to access it.

1

Create an account

You can create a free account by signing up here. 

2

Generate an API key

Once logged it, move to the platform website https://platform.openai.com

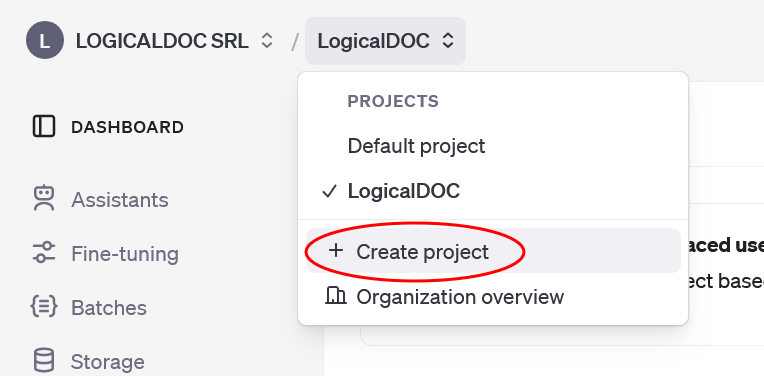
Here create a new project, call it LogicalDOC:

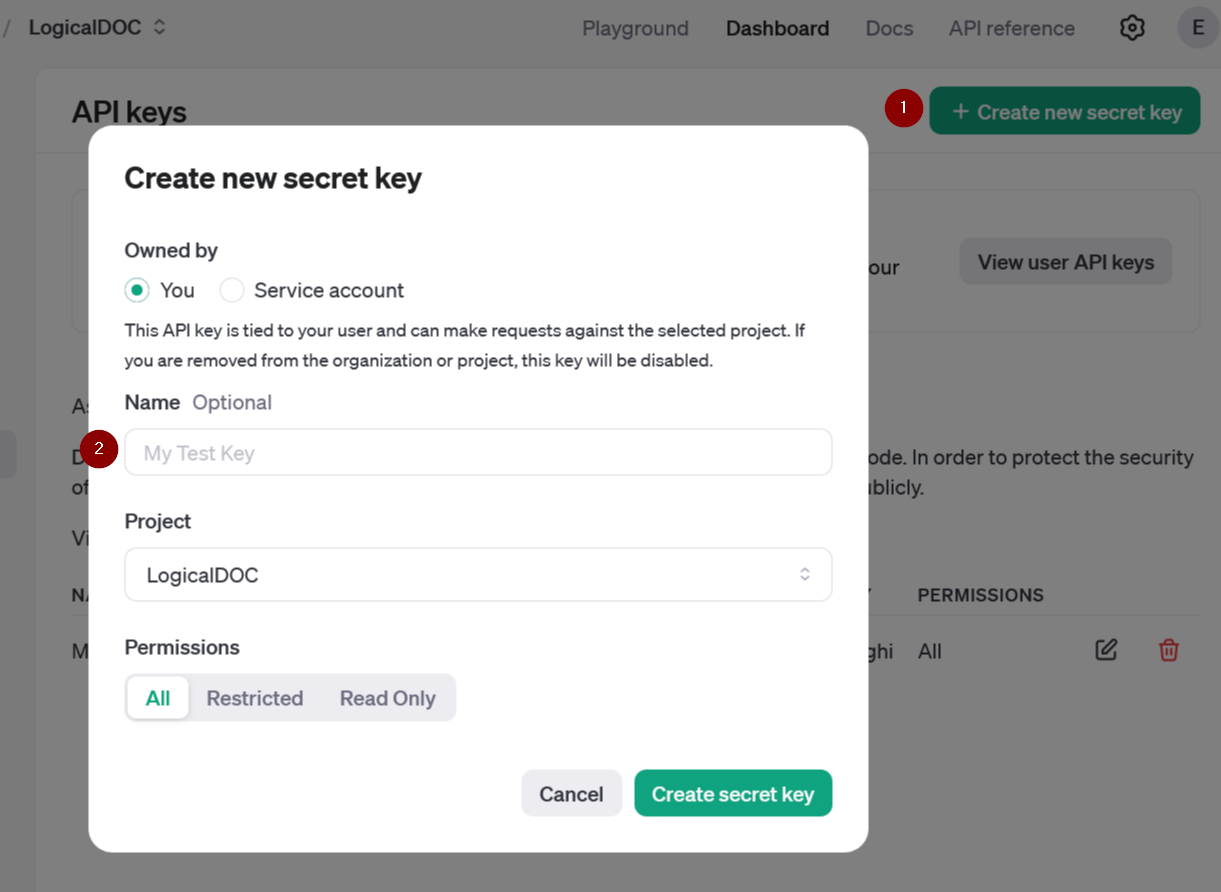
Then move to the created project, click on Generate new secret key and enter a name for your key in the pop-up window. After entering a name, click Create secret key. 

Create ChatGPT key

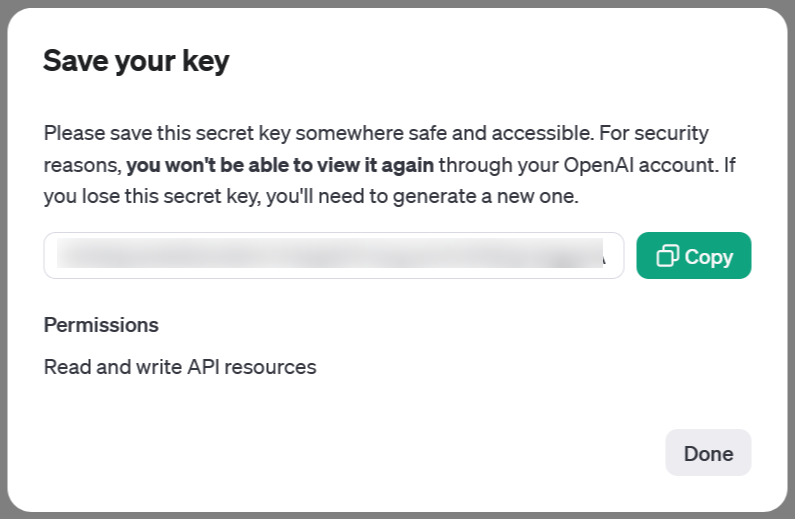
On the next screen, copy your API Key and store it somewhere safe. You will not be able to view it again.

Save ChatGPT key

3

Set up billing

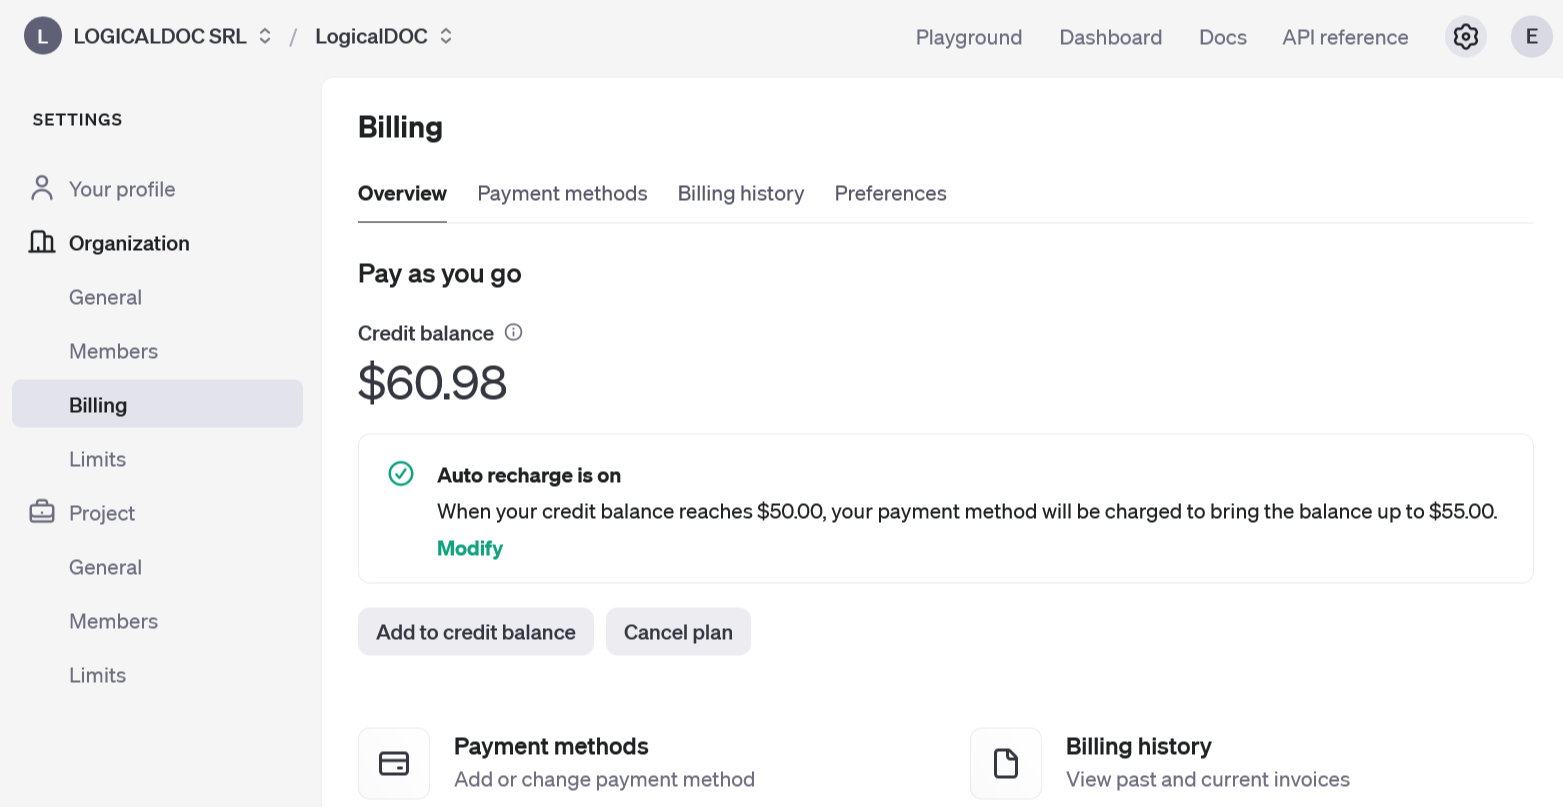
OpenAI implements a pay-per-use model for its API services. Therefore, it's essential to establish a payment method for billing purposes. Without this setup, the newly-created API Key will be inactive.

For billing configuration, go to your profile's section and select Billing from the left-hand menu, and then choose Add payment details.

ChatGPT billing

4

Set the Key in LogicalDOC

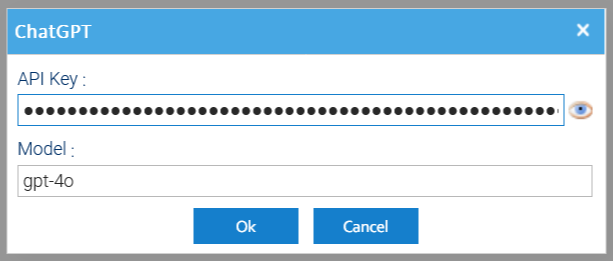
Open LogicalDOC, select whatever folder in the folder's tree and open the menu Tools > ChatGPT > Settings

Here, put the key you saved at step 2 and specify the ChatGPT model you want to use (at the time of writing, the default model is gpt-4o).

Then press on Ok and you’re done.

PowerPoint Addin

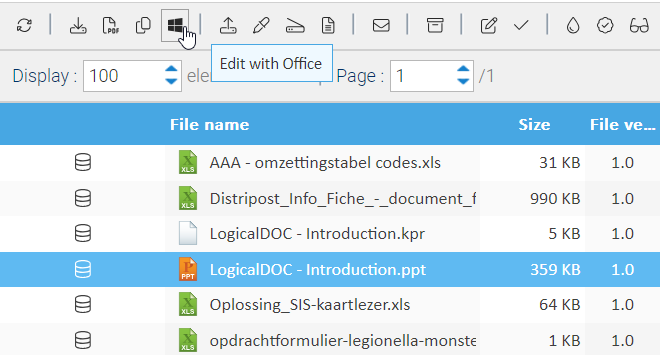
You can edit a PowerPoint document by simply selecting the item and then click on the [Edit with Office] icon. After that, the document is visualized into Microsoft PowerPoint.

edit-with-office
 

When the editing is completed, you must select the [LogicalDOC] tab and then click on [Save in LogicalDOC] button.

The new document file is saved into the system and a new version of the document is stored into the documents archive.

Microsoft Office Addin

The LogicalDOC Microsoft Office Add-in integrates Microsoft Office applications with the LogicalDOC document management system, allowing users to work with documents stored in the repository directly from their familiar Office environment.

Once installed and connected to a LogicalDOC server, the Add-in allows you to browse and search the document repository, open and edit documents, manage document properties and tags, and save new or modified files directly into LogicalDOC. Versioning and document locking are handled by LogicalDOC, helping users collaborate safely while maintaining the complete document history.

The Add-in integrates with Microsoft Word, Excel, PowerPoint, Visio and Project, providing convenient access to LogicalDOC without requiring users to continuously switch between Microsoft Office and the web interface.

The Office Add-in can also be launched directly from the LogicalDOC web interface using the Edit with Office command available from a document's context menu. When this command is selected, LogicalDOC opens the appropriate Microsoft Office application according to the document's file extension, while the Add-in automatically manages the document editing workflow.

In this mode, the Add-in automatically checks out the document before editing and checks it back in when the document is saved. LogicalDOC therefore handles document locking and versioning transparently, creating the new document version during the save process while the user continues to work in the native Microsoft Office application.

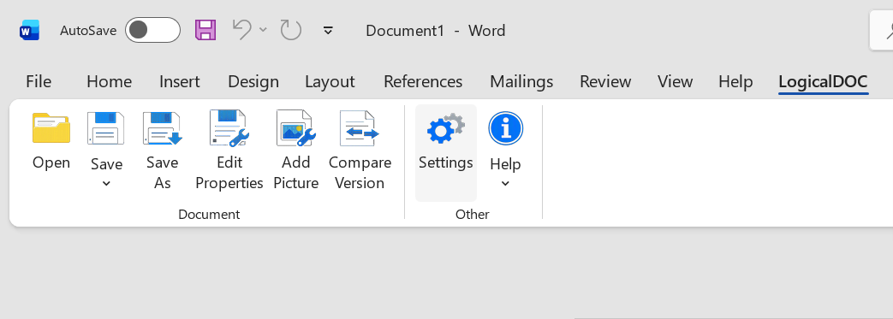
LogicalDOC Microsoft Office Add-in ribbon menu

Video overview

Pre-requisites

Microsoft Office must be installed on your Windows PC.

Install the latest version of the LogicalDOC Office Add-in available from the LogicalDOC download website.