LogicalDOC allows the extraction of fields from your scans using barcodes or OCR zones. The prerequisite is that the document must be assigned to a template that define a list of extended attributes.
Extract the fields with the Zonal OCR
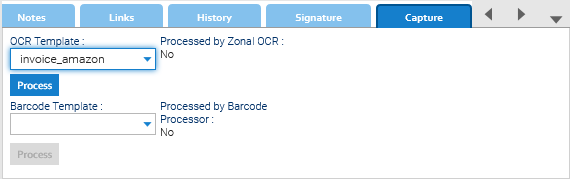
In the Capture tab, open the OCR Template drop-down list and select one of the OCR templates available for the document's template and save.
Now you can click on the Process button to start the elaboration, at the end just open the Ext. Properties tab to see how the fields were extracted.
Extract the fields with the Barcodes
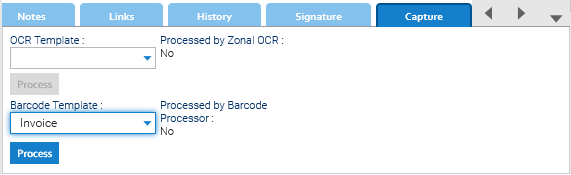
In the Capture tab, open the Barcode Template drop-down list and select one of the barcode templates available for the document's template and save.
Now you can click on the Process button to start the elaboration, at the end just open the Ext. Properties tab to see how the fields were extracted.
Reading Confirmation
Sometimes it is necessary to have evidence that a colleague has completely read a certain document, for example an important contract, a project or a medical diagnosis. With LogicalDOC you can invite one or more colleagues to read a document and the system takes care of checking that this happens and notifying you if necessary. If you have the reading request permission, select a document and click on the Request reading icon of the toolbar.
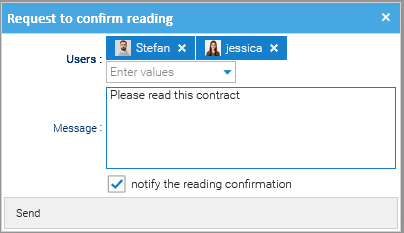
A dialog box allows you to choose the recipients to send the request to read the selected file.
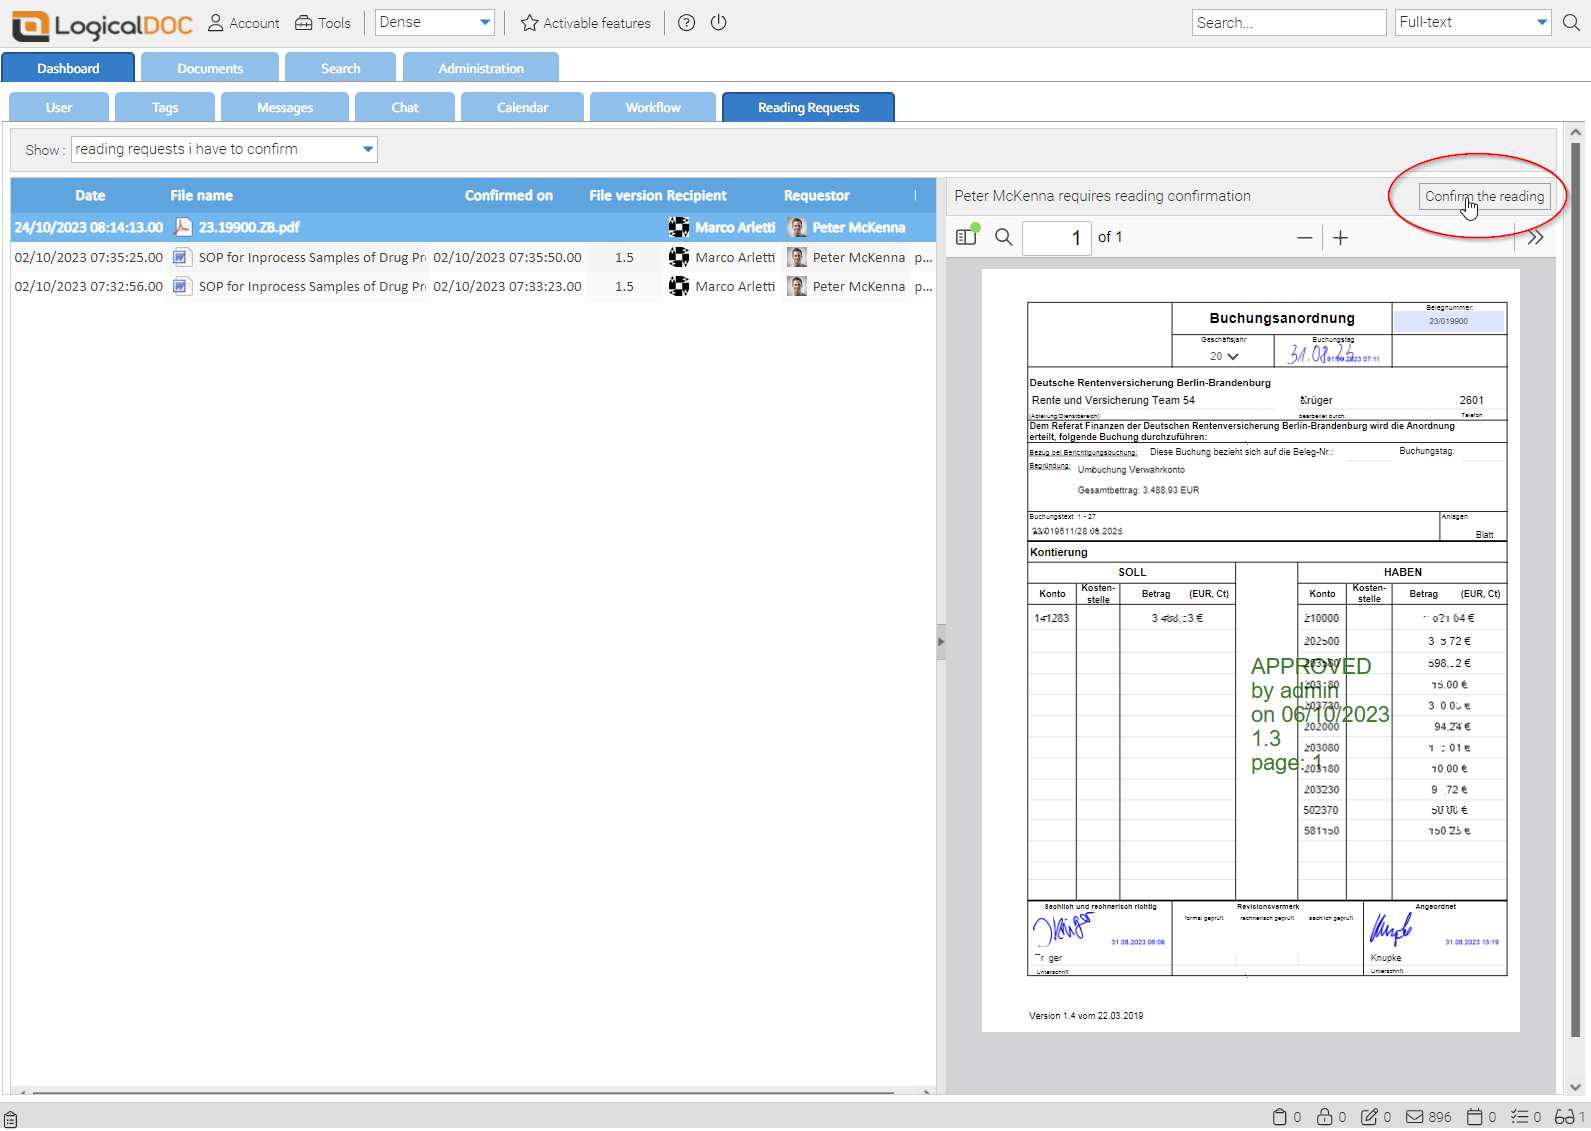
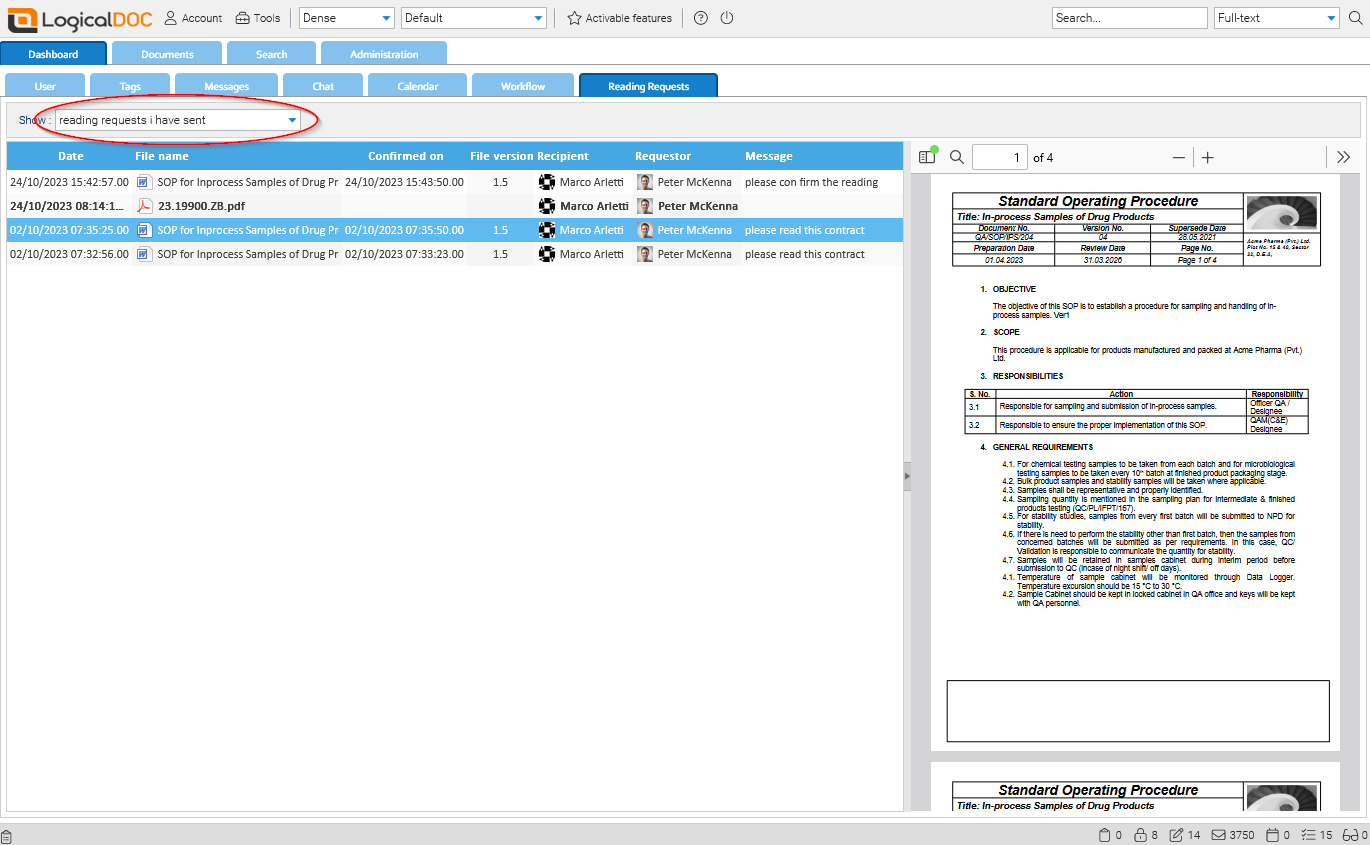
You may write a message to include in the notification sent to the recipients, and optionally ask to be notified when the document has been read. The selected users will be notified about this your request, and they can enter the dashboard to see all the reading requests:
Each row of the panel refers to a reading request and in the preview panel you can read the document, as soon as you have displayed all the pages the Confirm reading button appears.If you click on that button, the reading gets confirmed.
When a user confirms the reading of a document, the requestor will be notified and can check the status of all his reading requests in the dashboard:
Adding new documents
In LogicalDOC, there are a variety of ways that a user can upload documents. The options are described below. It is important to remember that the user must select a folder with write permission to be able to create new documents.
Maximum number of documents per folder
Do not put a huge amount of documents(more than 10,000) all in the same folder because it will lead to inefficiencies and make difficult the browsing. Best practice is to distribute your documents among different folders. To enforce this best practice, a configurable parameter is provided at Administration > Settings > Parameters > maxdocsperfolder
Standard upload
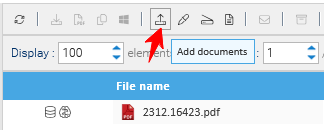
Click on the Add documents icon on the toolbar.
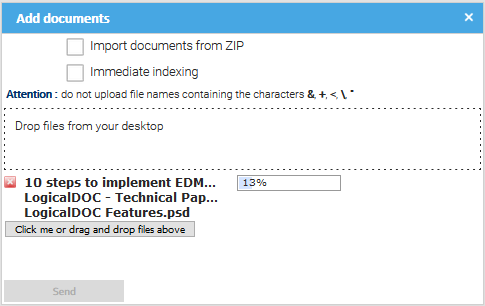
An upload popup window will be shown. You can select one or more files from your PC that you want to place in the current folder. Depending on the configuration of your LogicalDOC, your files can be checked by the antivirus software. And you may not be allowed to upload It is possible that some extensions or large files cannot be uploaded.
Use the option 'Immediate indexing' if you want LogicalDOC to immediately index your new documents (normally, documents are indexed in the background).
If you want to upload a folder’s structure, you can upload a .zip file and select the option 'Import documents from ZIP'. However, in this case, the import will be executed separately. You will be notified of the conclusion of the import process by a system message. Once the upload is completed, click on Send and a second dialog box will allow you to enter the metadata that will be applied to the new documents.
Maximum upload size
By default, you cannot upload files larger than 100MB. This setting can be changed in Administration > Settings > GUI Settings > Upload max. size
Drop Spot
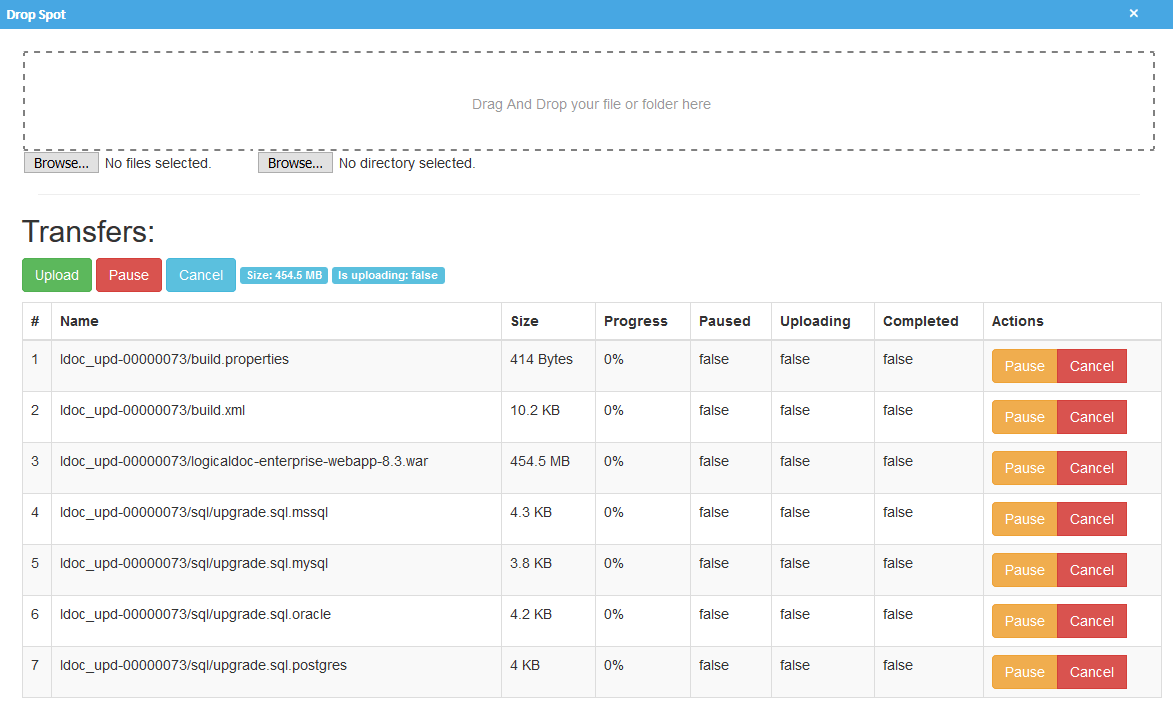
LogicalDOC supports a feature called Drop Spot that allows you to drag and drop files and folders directly from your desktop into the documents' repository. To activate Drop Spot, simply click on the icon in the documents' toolbar.
Now you can drag and drop your files and folders in the square and then click on Upload to start all the transfers. Once you are finished, just close the Drop Spot popup.
Notify Users
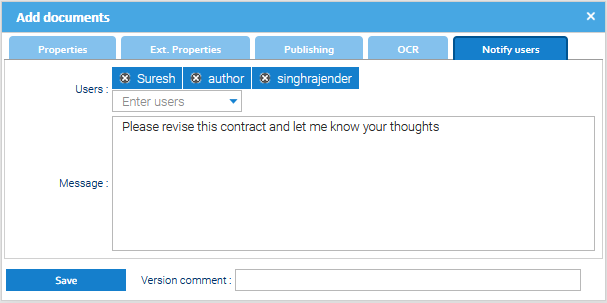
Sometimes you wish a set of users to be notified about the new upload, to do so just enter the Notify users tab of the upload dialog and choose what users must be notified.
You can optionally provide your own message that will complete the details sent to the users.
Publishing
You can define the publishing status of each specific document by accessing the Publishing section. To be able to handle the publishing settings you have to belong to the admin or publisher group.
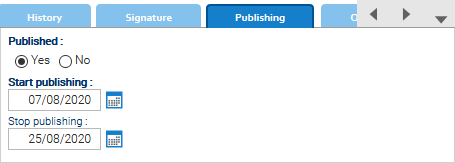
Inside the Publishing panel you have the following settings:
Published: Use this selector if you want to unpublish the document regardless of what is specified in publication dates
Start publishing: This field is mandatory and specifies the date from which the document is available
Stop publishing: This is an optional date after which the document will be no more available
A document is available for normal users only if it is published and if the current date matches the publishing time frame.
The users in the groups admin and publisher will be always able to see unpublished documents and change the publishing settings.
Annotating a Document
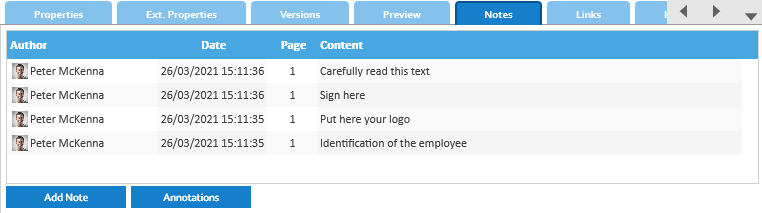
You can add notes on the documents, via the Notes tab. Notes enable users to discuss the document and its evolution.
All users with read permission can see the notes added to a document.
You can add a new note by clicking on the button Add Note. Put your comment in the editor and confirm with Save.
Editing or deleting a note
You can edit or delete a note you have added before simply by right-clicking on it and choosing Edit or Delete.
Content Annotations
Annotations are post-its or comments placed on the content of documents. You can annotate documents as soon as you can access them, i.e. when you have at least "Read" permission.
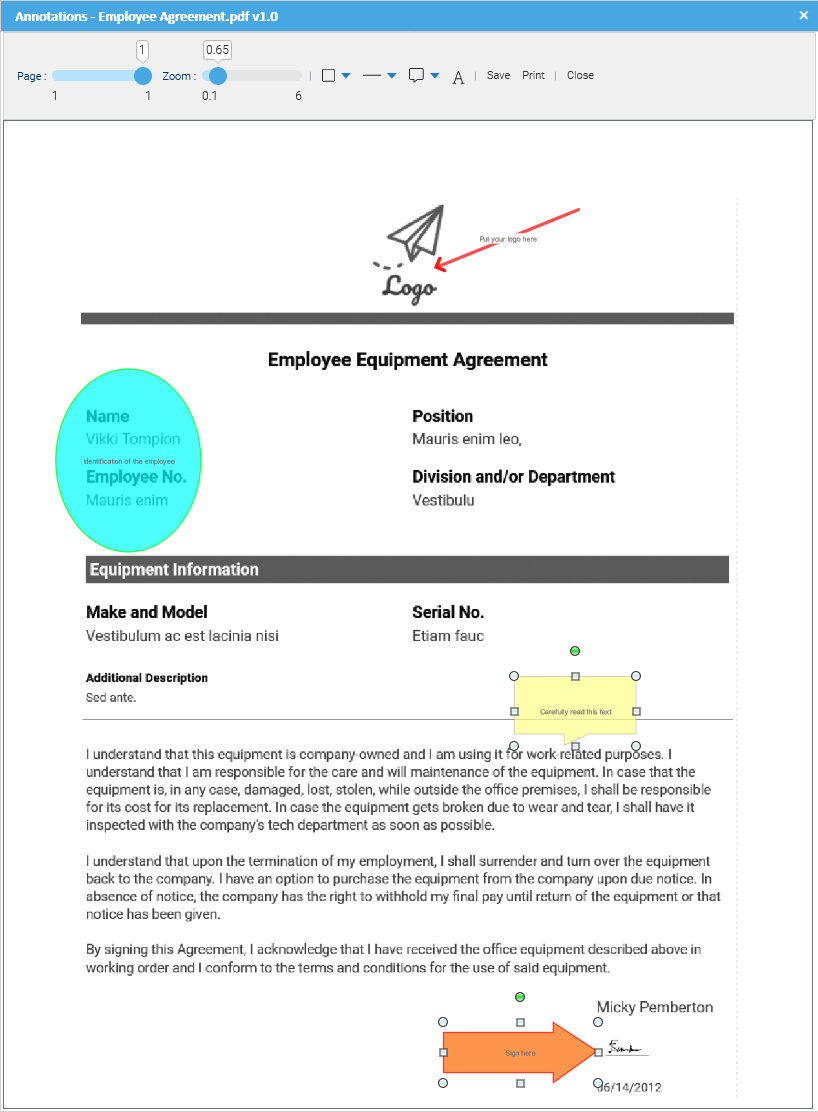
To open the editor, click on Annotations, here you can browse the pages and add different annotations.
In the toolbar you find the buttons to add annotations of different shapes: squares, circles, arrows and more.
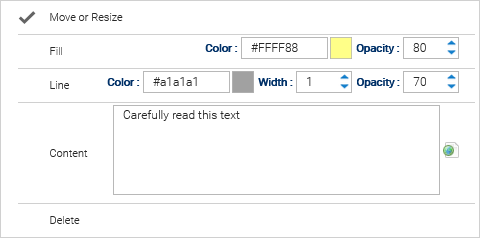
Right-click on an annotation to open the editor that allows you to change the text and look & feel.
Remember to click the Save button to make persistent all your annotations.
Warning
Due to different technological aspects including the limitations of HTML and the precision with which the numbers are saved in the database, once the annotations are saved, they may be displayed in an inaccurate way.
Security
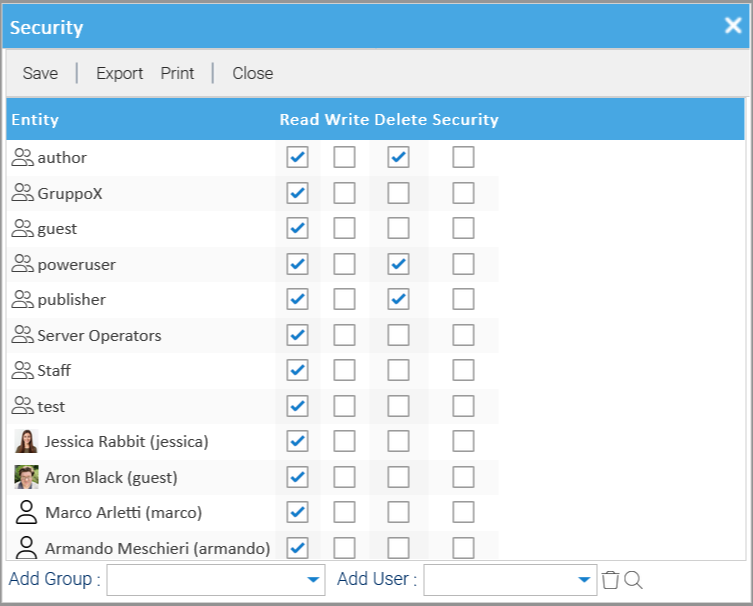
When you create a note or annotation it inherits the ACLs of the document, then you can change them by choosing the Security item of the contextual menu.