Install on QNAP

QNAP is a global producer of powerful yet affordable Network-Attached Storages (NAS). LogicalDOC is the perfect companion for your QNAP device. Find more information about QNAP here: https://www.qnap.com.

Warning

Before installing LogicalDOC inside your device, you should be aware of the hardware requirements and limitations. Click here to find out more.

Install the Container Station package

In QNAP, LogicalDOC will run as a Docker container. Docker is a virtualization environment available on all QNAP devices, so open the App Center and install the Container Station package.

Set up the Database container

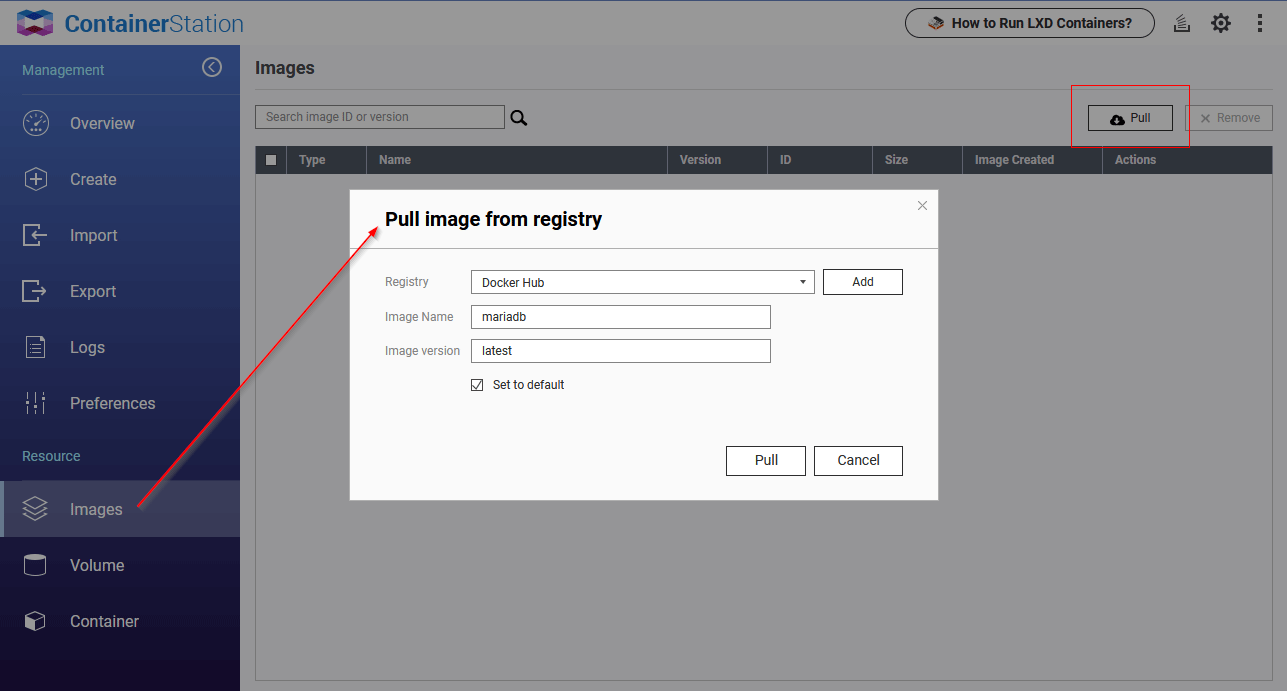
We will set up a MariaDB container that will be used by LogicalDOC, so enter the Images tab of the Container Station interface, here click on the Pull button and download the latest mariadb image from Docker Hub.

Search for MariaDB

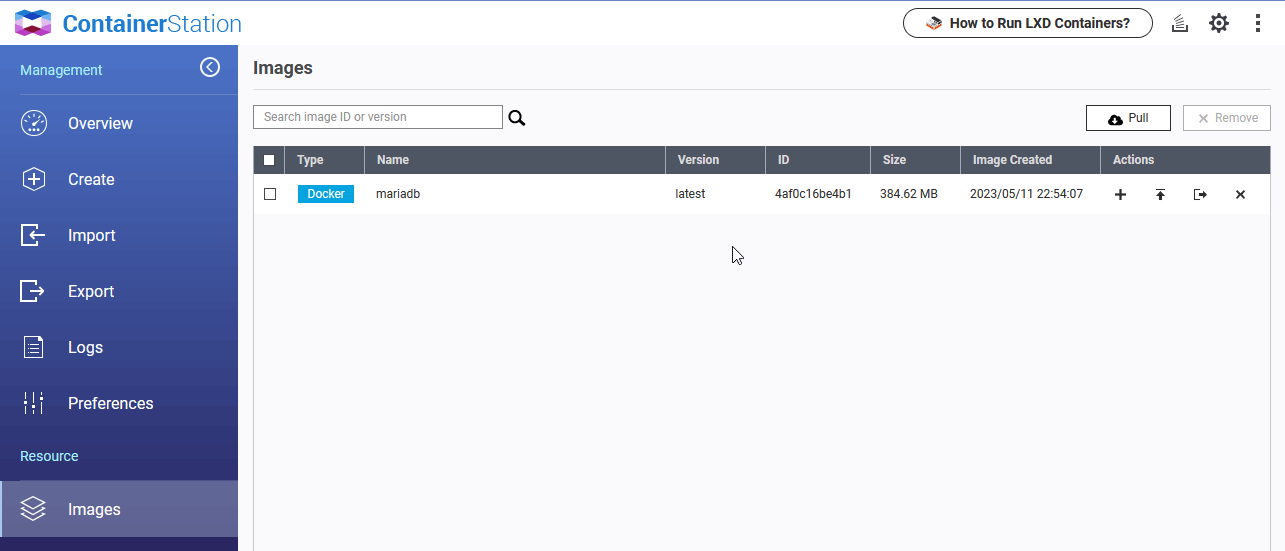
MariaDB image

Once the image gets downloaded, click on the icon Create container to create the container, the wizard will ask you the parameters, be sure to give the container name's logicaldoc-db:

MariaDB container creation

MariaDB container name

Configure the working parameters

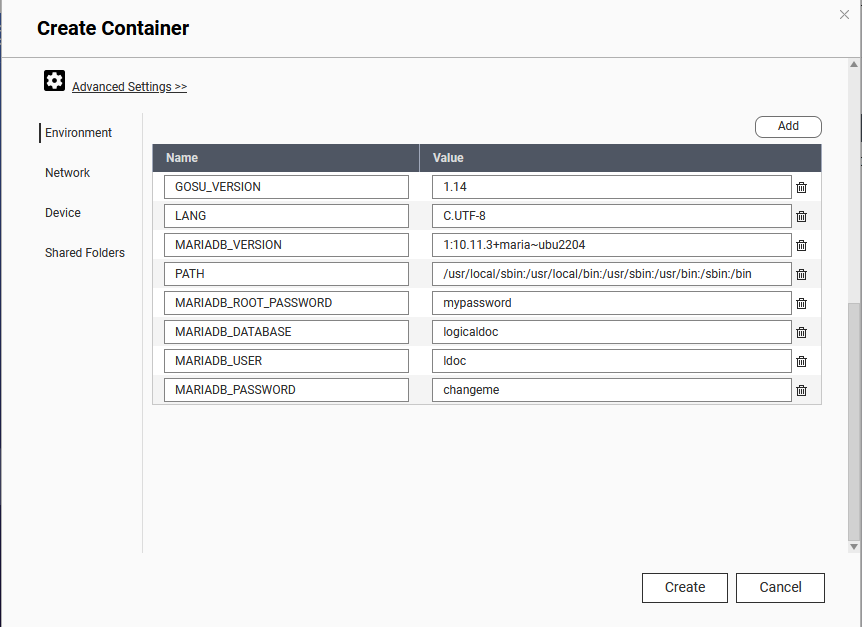
Open the Advanced Settings and with the Add button set the following parameters:

ParameterSuggested valueDescription
MARIADB_ROOT_PASSWORDmypasswordthe password of the root user, LogicalDOC will not use it but you may use to manage your database
MARIADB_DATABASElogicaldocname of the database where LogicalDOC will store the data
MARIADB_USERldocusername used by LogicalDOC to connect to the database
MARIADB_PASSWORDchangemepassword used by LogicalDOC to connect to the database

MariaDB advanced settings

Map the ports

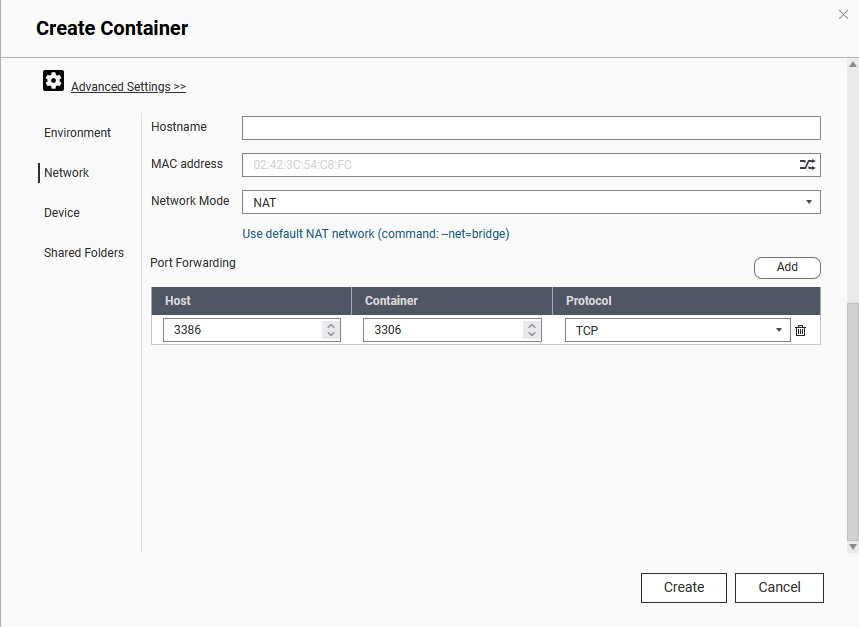
Open the Network tab and map the Container Port 3306 to the Host Port 3386.

MariaDB ports

Check the running container

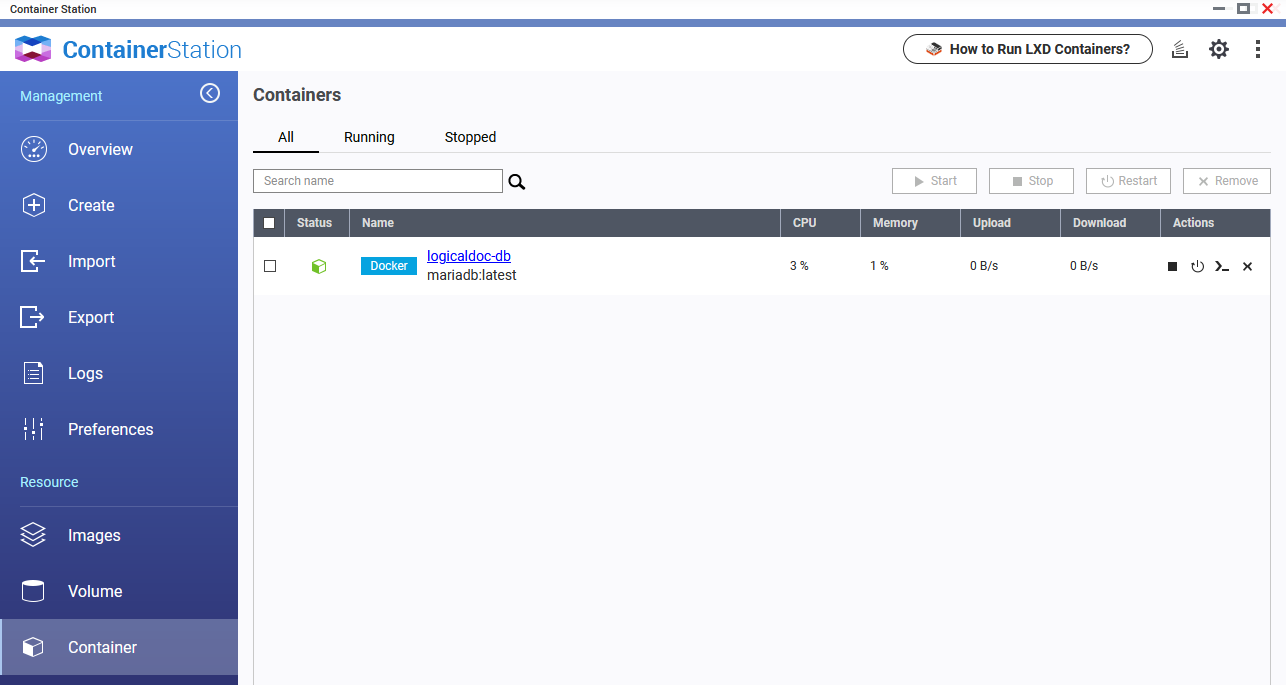
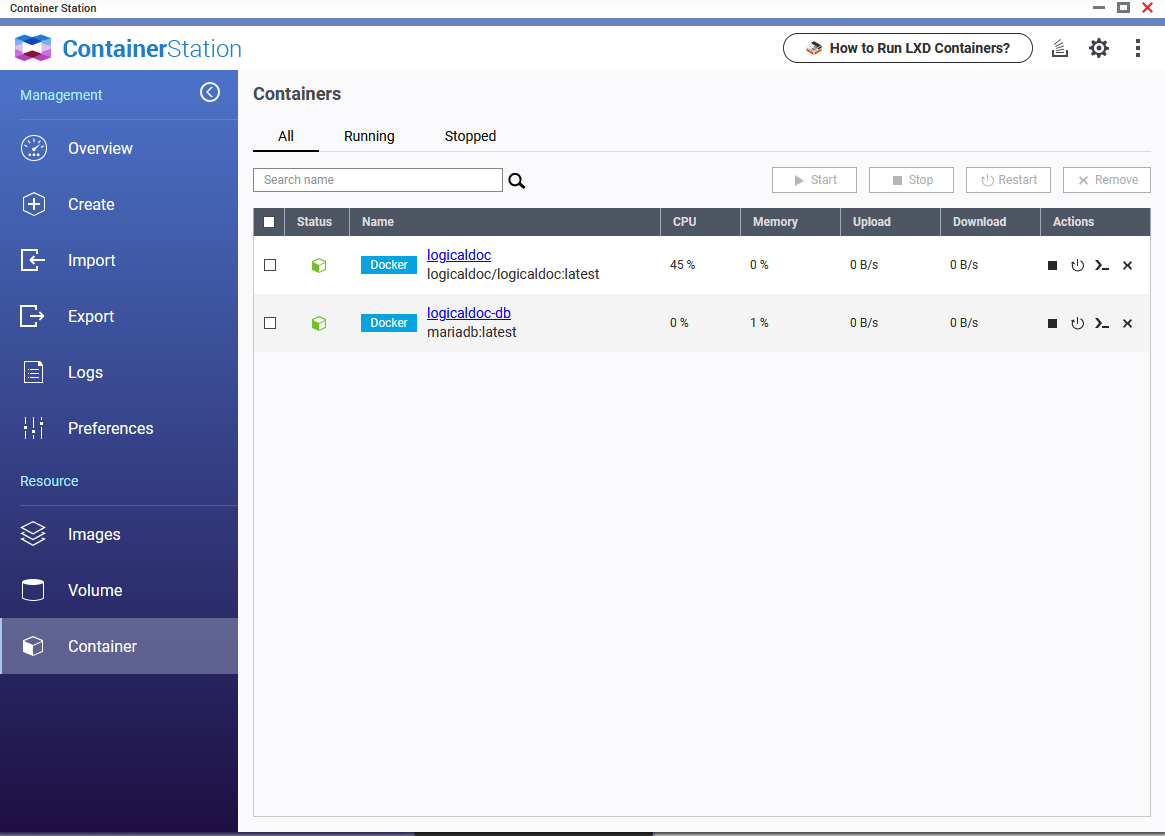
At the end, you should see the logicaldoc-db container up and running in the Container area:

MariaDB container running

Set up the LogicalDOC container

After setting up the database, you proceed now to set up the container of the LogicalDOC application.

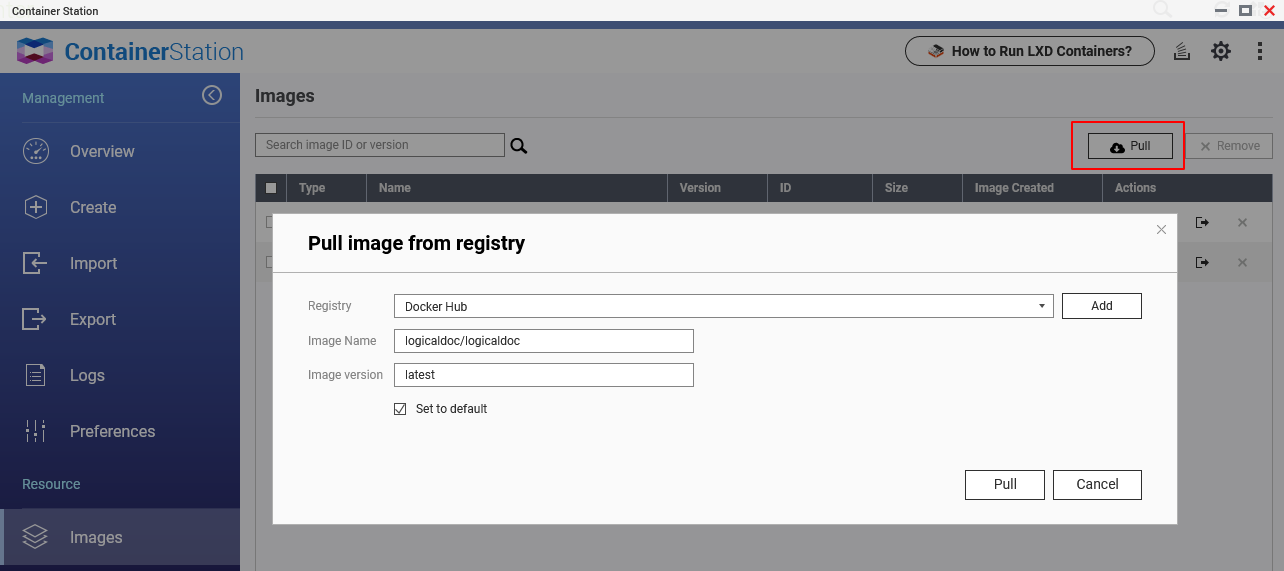
Open the Images tab of the Container Station interface, here click on the Pull button and download the latest logicaldoc/logicaldoc image from Docker Hub.

Search for LogicalDOC

LogicalDOC image

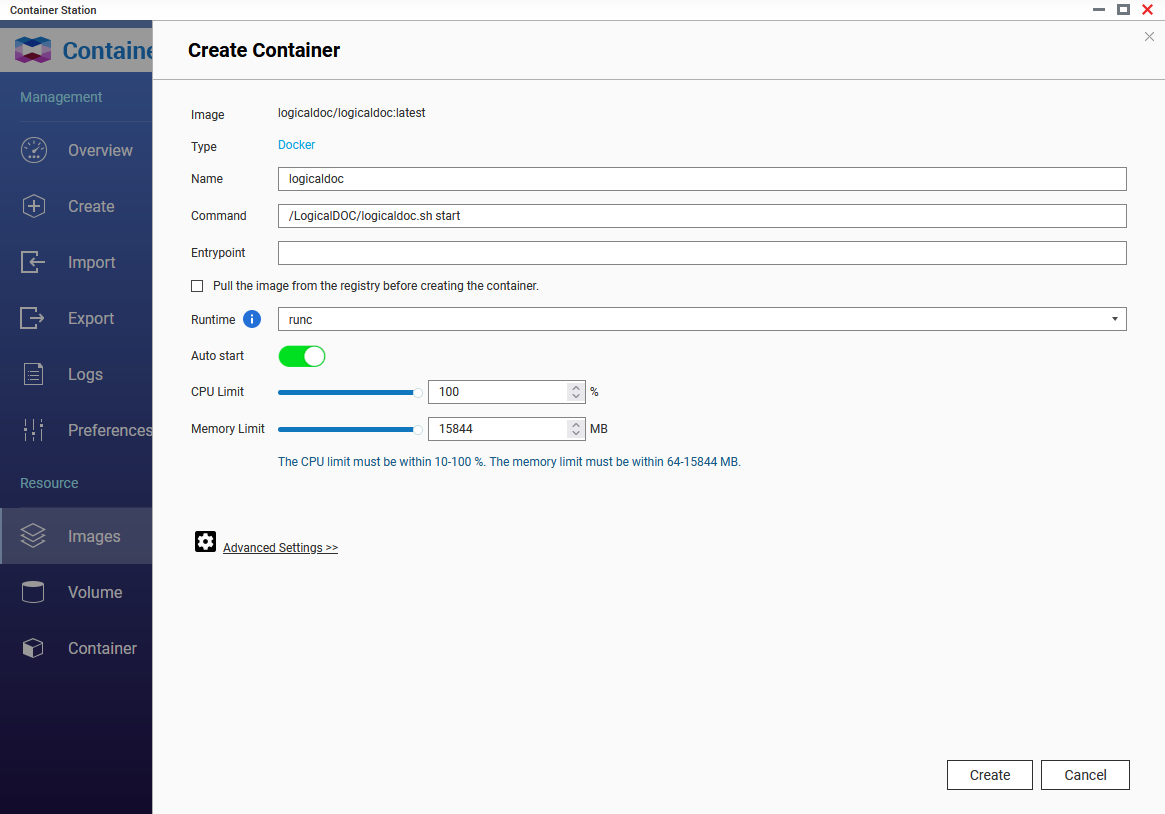
Once the image gets downloaded, click on the icon Create container to create the container, the wizard will ask you the parameters, be sure to give the container name's logicaldoc:

LogicalDOC container creation

LogicalDOC container name

Configure the working parameters

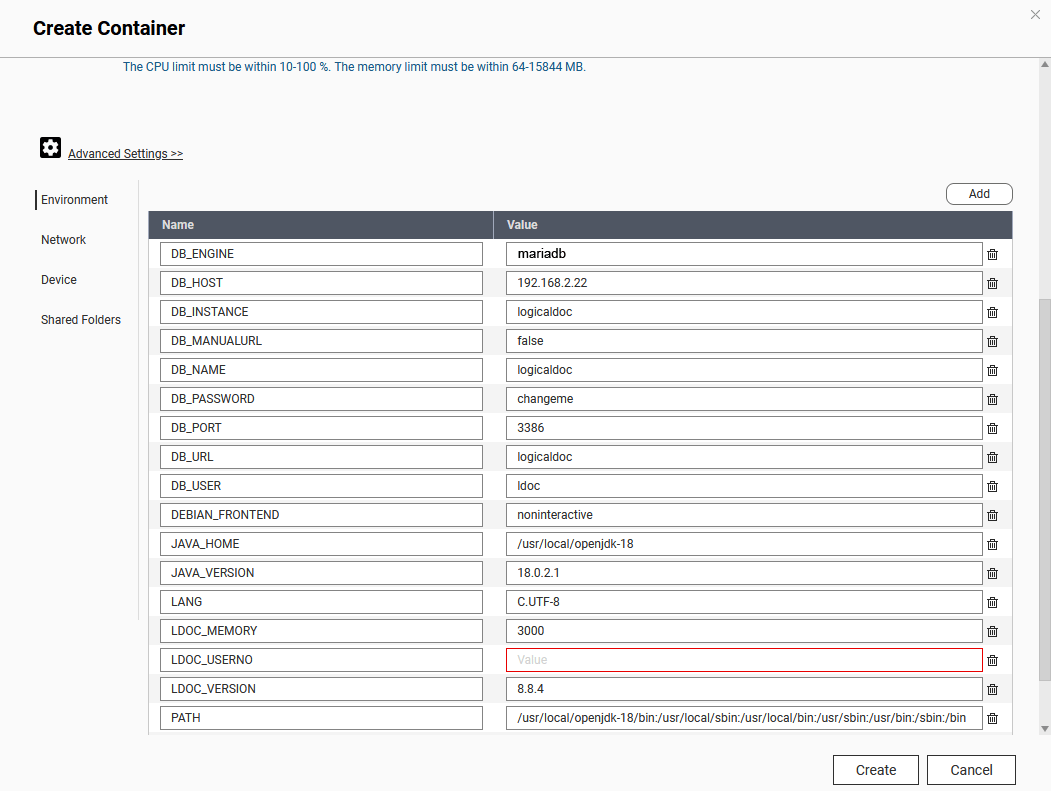
Open the Advanced Settings and set the following parameters:

ParameterSuggested valueDescription
LDOC_USERNOyour own license codeyou can get a trial license here: https://www.logicaldoc.com/try
LDOC_MEMORY3000memory allocated for LogicalDOC expressed in MB
DB_ENGINEmariadbthe database type, possible vaues are: mariadb, mysql, mssql, oracle, postgres
DB_HOSTthe IP of your QNAPthe database server host
DB_PORT3386the database communication port, use the same port used for the logicaldoc-db contain
DB_NAMElogicaldocthe database name, use the same db name used for the logicaldoc-db container
DB_INSTANCElogicaldocsome databases require the instance specification
DB_USERldocthe database username, use the same username used for the logicaldoc-db container
DB_PASSWORDchangemethe database password, use the same password used for the logicaldoc-db container
DB_MANUALURLfalsenot used, leave it false
DB_URLlogicaldocnot used, leave it logicaldoc
SSH_USERlogicaldocthe username to connect via SSH
SSH_PASSWORDchangemethe password to connect via SSH

LogicalDOC advanced settings

Map the ports

Open the Network tab and map the Container Port 8080 to the Host Port 1280 and the 22 to 1222:

LogicalDOC ports

Map the volumes

We suggest creating a dedicated folder called logicaldoc somewhere in your NAS and then the subfolders logicaldoc/conf and logicaldoc/repository

Then open the Shared Folders tab and map those folders to the LogicalDOC's volumes /LogicalDOC/conf and /LogicalDOC/repository:

LogicalDOC volumes

The volume /LogicalDOC/conf is where LogicalDOC saves the main configuration files, while the /LogicalDOC/repository is where your documents files are stored.

Check the running container

At the end, you should see the logicaldoc container up and running in the Container area:

LogicalDOC container running

At this point you should be able to enter LogicalDOC at http://IP_OF_YOUR_QNAP:1280  with admin as username and password

Install on Ubuntu

On Ubuntu linux you need to install and execute LogicalDOC as root user(command sudo su), make sure to log-in as root before continuing, since this guide assumes you perform all the operations as root.

To install in Ubuntu you have to provide at least these two components:

Java JDK (Java Development Kit)

Download and install Java JDK(version 11 or more recent) for your server system from 
http://www.oracle.com/technetwork/java/javase/downloads/index.html.

In any case visit http://www.oracle.com/technetwork/java/index.html for more informations.

You can check the presence of Java in your system by executing this command from a terminal:

$ java -version

LogicalDOC requires Java JDK 11 in order to work properly.
If the above command returns a different version of java, follow the instructions below to install the Java JDK 11.

Execute the following commands on the Terminal by copying and pasting them one at a time (Ubuntu 12.04)

$ sudo apt-get purge openjdk*
$ sudo add-apt-repository ppa:webupd8team/java
$ sudo apt-get update
$ sudo apt-get install oracle-java11-installer

MySQL

In order to setup a production system you have to provide a MySQL database where the application will store all data.
To perform this step, make sure to have a MySQL up and running, if this is not the case install it: http://www.mysql.com/downloads/mysql/

Make sure to log-in as root

This guide assumes you are performing the installation by using the user root

To make sure to log-in as root before continuing, please execute the command sudo su from a terminal

Prepare the Database on Ubuntu

In order to setup a production system you have to prepare a MySQL database where the application will store all data.
To perform this step, make sure to have a MySQL up and running, if this is not the case install it: http://dev.mysql.com/downloads/mysql/

Once your MySQL instance is up and running, please open a terminal and execute this command:

$ sudo su

Type your password as requested in order to login as the root user.

Default settings

LogicalDOC requires you to configure your MySQL installation to best fit the needs of a professional DMS, so we need to edit the file /etc/my.cnf in this way:

$ vi /etc/mysql/my.cnf

Now edit your current my.cnf configuration file, and make sure to have the following settings in the [mysql] and [mysqld] sections:

[mysql]
default-character-set = utf8

[mysqld]
character-set-server = utf8
collation-server = utf8_bin
default-storage-engine = INNODB

This sets the encoding to UTF-8 and the default storage engine to the INNODB with transactions support.

Setting Password for MySQL Root User

Execute the following command at a shell prompt:

$ mysqladmin -u root password 'password'

Creating the database

Connect to mysql prompt typing the command:

$ mysql -u root -ppassword

Execute the following command at the mysql prompt:

CREATE DATABASE logicaldoc;

Now we have an empty database called logicaldoc with a user root that can access it using password password.
You can exit the mysql prompt(command \q) and go ahead.

http://dev.mysql.com/doc/refman/5.1/en/macosx-installation.html

Install the Application on Ubuntu

Get from the download website the setup file: installer-linux-<ver>.zip

To install LogicalDOC unpack the zip archive, open a terminal window and execute the command from command line:

$ java -jar logicaldoc-installer.jar

If the system does not have a graphical interface, it is possible to launch the installation from the command console

$ java -jar logicaldoc-installer.jar -console

When the installer asks for database, please put your connection parameters as specified earlier during database preparation, don't use the embedded database for production.

Post-installation

To start LogicalDOC at server bootstrap you need to copy the startup script into your system initialization directory so execute the command:

$ sudo cp /LogicalDOC/bin/logicaldoc-all /etc/init.d
$ sudo chmod 755 /etc/init.d/logicaldoc-all

Then edit the file /etc/init.d/logicaldoc-all adjusting the paths.
Save the file and execute the commands:

$ sudo update-rc.d logicaldoc-all defaults
$ sudo service logicaldoc-all start

Now you can access the program using the browser, pointing it to http://localhost:8080/. Use the account admin with password admin to enter the first time.

Check the paths of external tools

After the installation it is better to check that all needed external apps are correctly configured.

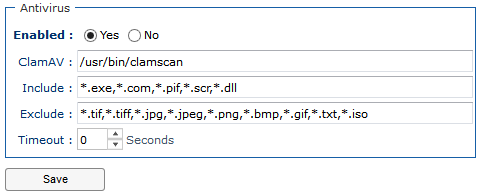
Enter the administration: Administration > Settings > Antivirus

Here, check if the path specified in ClamAV is correct.

Enter the administration: Administration > Settings > OCR

Here, check if the path specified in path is correct.

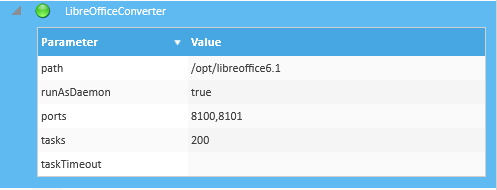
Enter the administration: Administration > Import & Export > Format Converters > LibreOfficeConverter

Here, check if the path specified in path is correct.

Enter the administration: Administration > Import & Export > Format Converters > ImageConverter

Here, check if the path specified in path is correct.

Enter the administration: Administration > Import & Export > Format Converters > GhostscriptConverter

Here, check if the path specified in path is correct.

NOTE: paths may be different in your system

Save